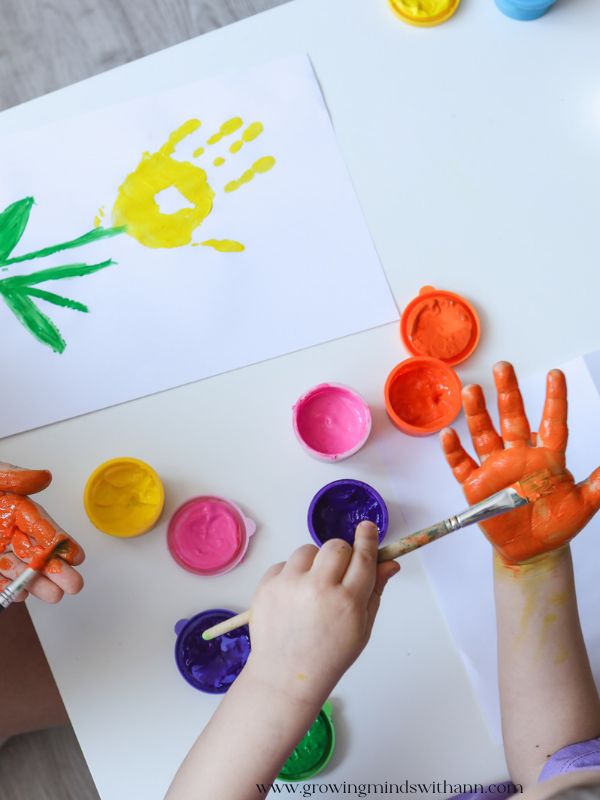
Bond with your kids this season with these 15 fall handprint crafts for toddlers and preschoolers that are adorable.
Crafting is one of those hands-on activities that children naturally enjoy. Little hands love staying busy, and channeling that energy into something creative can be both fun and meaningful. As a mom, I love activities that allow children to learn while having fun, especially when they do not feel like formal learning.
Fall brings so many simple opportunities to explore and celebrate the season with little ones. From colorful leaves to pumpkins and cozy autumn days, there is so much for toddlers and preschoolers to notice. Fall handprint crafts are a lovely way to introduce children to the season while letting them create something they can be proud of.
These crafts are simple, colorful, and easy to adapt for different ages and abilities. Your little one can turn their tiny handprints into pumpkins, trees, turkeys, leaves, and other fun fall designs. The best part is that each craft captures a little piece of their childhood that you can treasure later.
If you are looking for more seasonal activities to enjoy together, you can also check out my harvest crafts for kids for more simple and creative ideas.
In this post, you will find plenty of 15 fall handprint crafts for toddlers and preschoolers that are easy, playful, and perfect for a cozy fall afternoon at home or in the classroom.
15 Fall Handprint Crafts for Toddlers And preschoolers
1. Handprint Pumpkin
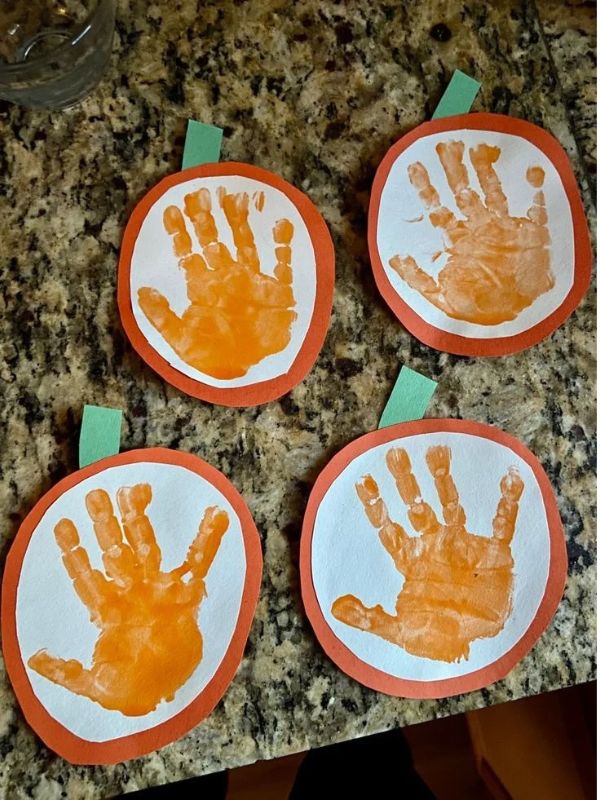
Pumpkins are such a fun part of fall, and turning a little handprint into a pumpkin makes the season even more special. This simple craft gives toddlers and preschoolers a chance to get creative while making a cute piece of autumn artwork.
Materials you will need:
- Orange washable paint
- Green and brown construction paper
- White cardstock
- Paintbrush
- Glue
- Scissors
How to make Handprint Pumpkin:
- Paint your child’s palm and fingers with orange washable paint.
- Press the painted hand gently onto the cardstock.
- Lift the hand carefully and let the handprint dry completely.
- Cut a small brown stem from construction paper.
- Cut a green leaf or curly vine for the top of the pumpkin.
- Glue the stem and leaf onto the dried handprint.
- Use paint brush to circle round the handprint with orange color.
For an extra special touch, make several pumpkins in different sizes and shades of orange. You can display them together as a little fall pumpkin patch made from your child’s handprints.
You can also use pumpkin template for this. For more pumpkin crafts, see 12 creative pumpkin painting for kids.
2. Handprint Leaf
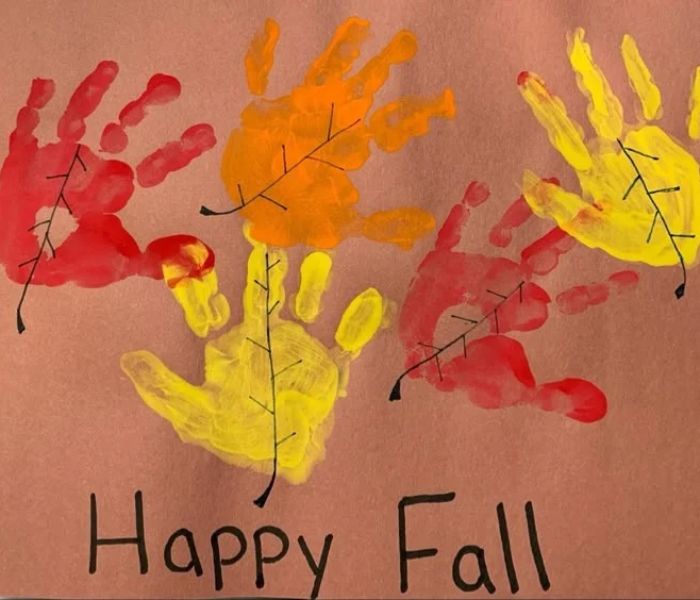
Fall leaves come in so many beautiful colors, making them perfect inspiration for a simple toddler or preschool craft. This activity is lovely when children are learning about how leaves change during autumn. You can even take a short walk together beforehand and look at the different leaf colors around you.
Materials you will need:
- Red, orange, or yellow, washable paint
- White cardstock
- Paintbrush
- Black marker
How to make handprint fall leaves:
- Choose one or two fall colors for your child’s handprint.
- Paint the palm and fingers evenly with washable paint.
- Gently press the painted hand onto the cardstock.
- Lift the hand carefully and allow the print to dry.
- Once dry, use a marker to draw a leaf stem from the palm.
- Add a few simple veins across the fingers to give the leaf more detail.
You can make several handprint leaves in different colors and display them together.
3. Handprint Turkey
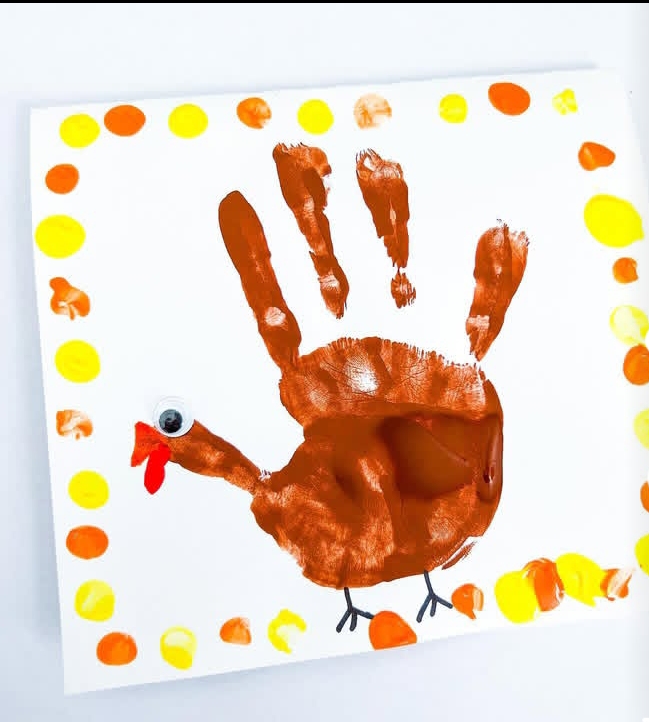
A handprint turkey is a classic fall craft that never seems to lose its charm. This is a fun craft, because little ones get to choose the colors and help create their own little turkey. Let your child enjoy the process rather than worrying about making it perfect.
Materials you will need:
- Washable red, yellow, orange, and brown paint
- White construction paper
- Googly eyes
- Glue
- Black marker
- Paintbrush
How to make Handprint Turkey:
- Paint your child’s palm brown for the turkey’s body.
- Gently press the painted hand onto the cardstock.
- Lift the hand carefully and let the print dry.
- Add googly eyes to the brown palm.
- Use orange paint to add a triangle for the beak.
- Add a small red paper wattle beside the beak.
- Use a marker to draw tiny legs beneath the turkey.
- Let your child decorate the background.
4. Handprint Acorn
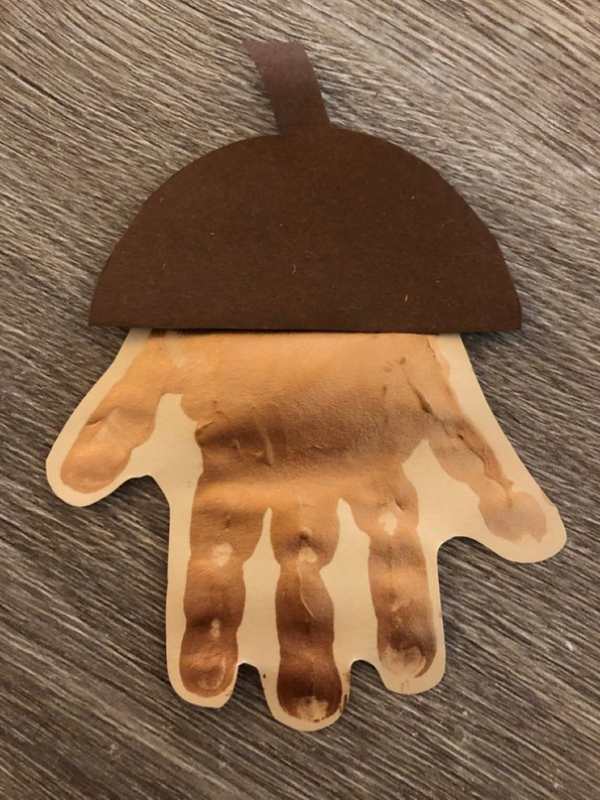
Acorns are one of those little signs that instantly remind us that fall has arrived. This handprint acorn craft is a sweet way to bring that cozy autumn feeling into your toddler or preschooler’s art time.
Materials you will need:
- Brown washable paint
- Light-colored cardstock
- Black construction paper
- Glue
- Scissors
How to make Handprint Acorn:
- Paint your child’s palm and fingers with brown washable paint.
- Press the painted hand gently onto the cardstock.
- Lift the hand carefully to reveal the handprint.
- Allow the paint to dry completely before adding the details.
- Cut a small acorn cap from black construction paper.
- Glue the cap over the top part of the handprint.
You may also see ice cream craft ideas for kids that are cool and creative.
5. Handprint Scarecrow
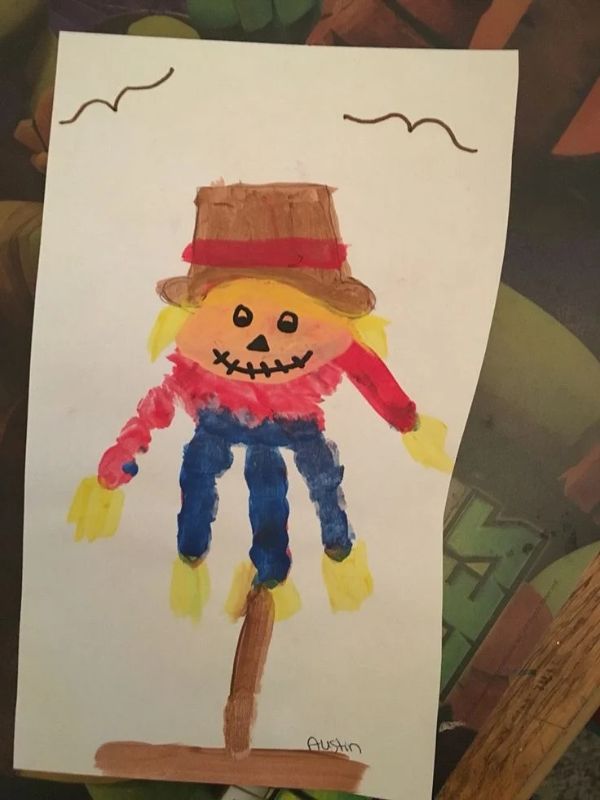
There is something so sweet about turning little hands into a friendly fall scarecrow. This craft is simple, playful, and perfect for an autumn afternoon at home or in the classroom.
You can let your child choose the scarecrow’s hat, clothes, and facial expression. Don’t worry if the handprint is not perfect. Those little fingerprints and paint marks are what make the finished craft special.
Materials you will need:
- Washable brown, orange, and yellow paint
- Brown cardstock
- Construction paper
- Glue
- Scissors
- Googly eyes
- Black marker
- Paintbrush
How to make Handprint Scarecrow:
- Paint your little one’s palm and fingers with the chosen paint color.
- Gently press the painted hand onto the cardstock.
- Lift the hand carefully and allow the print to dry completely.
- Cut out a small paper hat and glue it above the handprint.
- Add googly eyes and draw a simple nose and smiling mouth..
- Add a few paper leaves around the scarecrow to give it a cozy fall look.
6. Handprint Apple
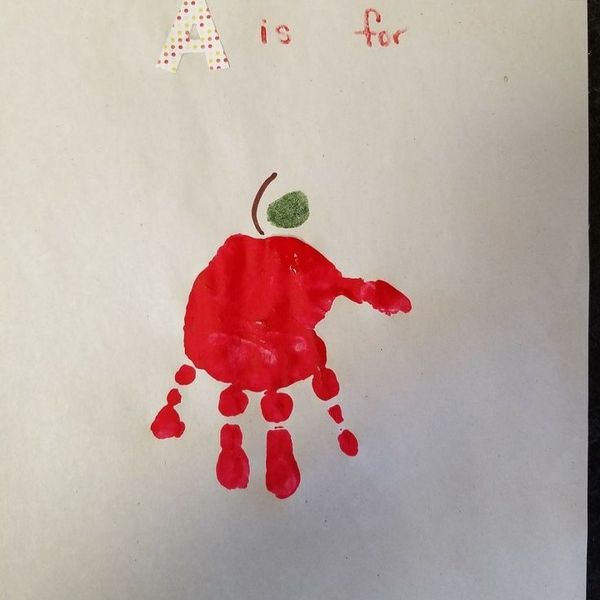
Apples are another sweet reminder of the fall season, especially when children are learning about autumn fruits. With a little paint and their tiny hands, they can turn a simple handprint into a cheerful apple craft.
This activity is easy enough for a quiet afternoon at home and can also fit nicely into an apple or fall-themed preschool lesson. Let your child choose between a red, green, or even yellow apple.
Materials you will need:
- Red, green, or yellow washable paint
- White cardstock
- Brown and green construction paper
- Paintbrush
- Glue
- Scissors
- Black marker
How to make Handprint Apple:
- Paint your child’s palm and fingers with the chosen apple color.
- Press the painted hand gently onto the cardstock.
- Lift the hand carefully and allow the handprint to dry.
- Cut a small brown stem from construction paper.
- Cut a simple green leaf to go beside the stem.
- Glue the stem and leaf onto the top of the handprint.
- Use a marker to add a few small details around the apple if desired.
For more apple themed activities see, 15 Apple crafts for kids that are fun and easy to make.
7. Handprint Fox
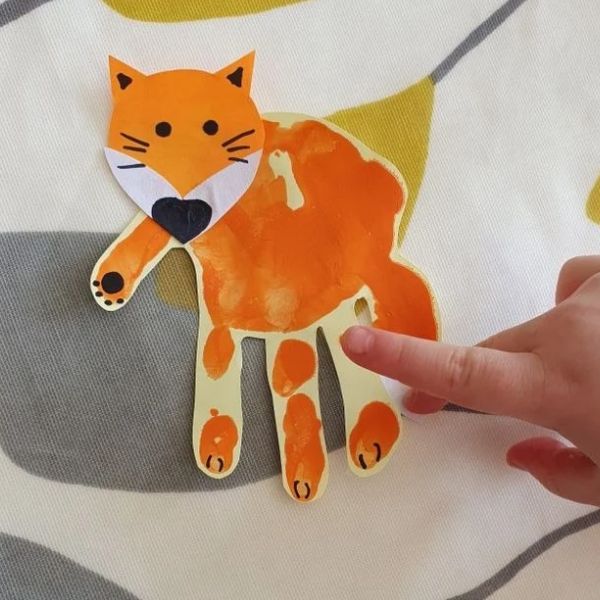
If your little one loves animals, this little handprint fox is sure to be a favorite. It combines a simple handprint with a few easy details to create a playful woodland animal.
The orange paint gives this craft a lovely fall feel, while your child’s tiny hand makes the fox extra special. It is a fun activity to enjoy after reading a fall or woodland-themed story together.
Materials you will need:
- Orange washable paint
- White cardstock
- Black and white construction paper
- Paintbrush
- Glue
- Scissors
- Googly eyes
- Black marker
How to make Handprint Fox:
- Paint your child’s palm and fingers with orange washable paint.
- Press the painted hand firmly onto the cardstock.
- Carefully lift the hand and allow the print to dry.
- Add two small paper ears to the top of the palm.
- Glue on googly eyes and add a small black paper nose.
- Use white paper to create a fluffy patch around the fox’s mouth.
- Draw a curved line beneath the fox to suggest its body.
8. Handprint Tree
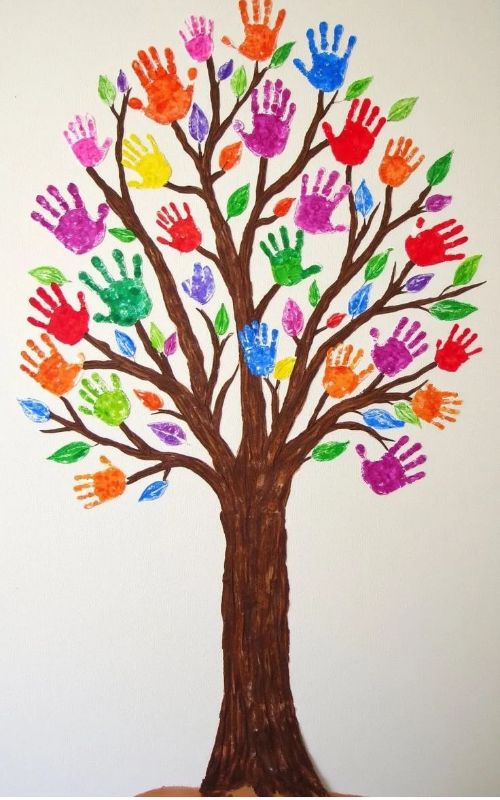
A handprint tree is a lovely way to capture the beauty of fall while letting your little one get creative. This craft is simple enough for young children and gives you a chance to talk about how trees change throughout the seasons.
Materials you will need:
- Brown washable paint
- Red, orange, yellow, and green paint
- White cardstock
- Paintbrush
- Glue
- Brown marker
How to make Handprint Tree:
- Use brown paint to create the trunk of the tree.
- Add colorful handprints around the branches to create autumn leaves.
- Continue adding handprints until the tree looks full and colorful.
- Glue a few small paper leaves around the bottom if desired.
9. Handprint Hedgehog
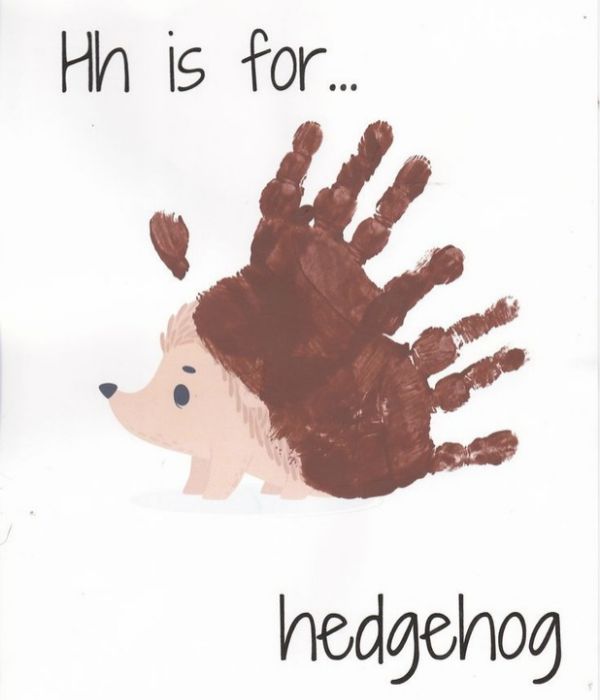
A little handprint can make the cutest hedgehog, and this one is especially fun for toddlers and preschoolers. You can make this activity part of a fall animal theme or enjoy it after a nature walk. Let your child add leaves, acorns, or grass around the hedgehog to create a cozy autumn scene.
Materials you will need:
- Brown washable paint
- White cardstock
- Black construction paper
- Googly eye
- Glue
- Scissors
- Black marker
- Paintbrush
How to make Handprint Hedgehog:
- Paint your child’s palm and fingers with brown washable paint.
- Press the painted hand onto the cardstock.
- Lift the hand carefully and allow the print to dry.
- Cut a small oval shape from black paper for the hedgehog’s face.
- Glue the face onto the side of the palm.
- Add a googly eye and a small black nose.
- Use a marker to draw a tiny smile and some simple feet.
You may also like; best baby playpen ideas for babies and toddlers.
10. Handprint Owl
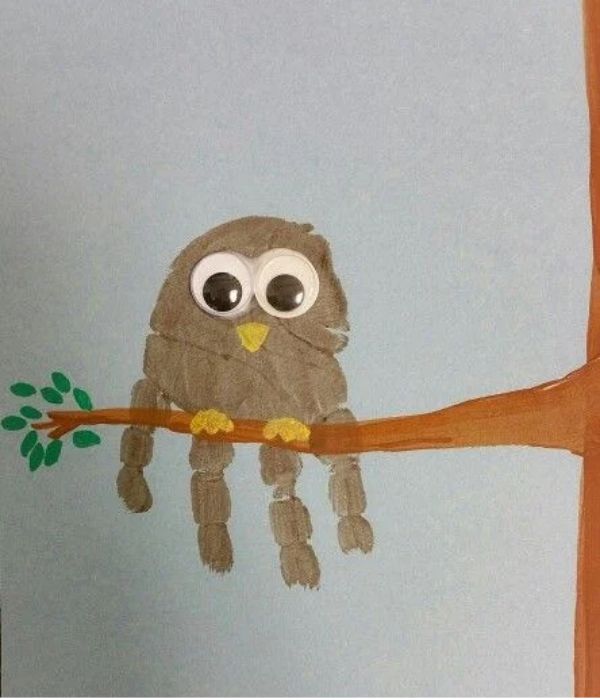
Owls make such a charming addition to a collection of fall crafts. With a little brown paint and a few simple paper details, your toddlers or preschooler’s handprint can become a cute woodland owl.
This craft is easy to set up and gives children plenty of opportunities to practice gluing, choosing colors, and adding their own creative touches.
Materials you will need:
- Brown washable paint
- White cardstock
- Yellow construction paper
- Paintbrush
- Glue
- Scissors
- Googly eyes
- Black marker
How to make Handprint Owl:
- Paint your child’s palm and fingers with brown washable paint.
- Press the painted hand gently onto the cardstock.
- Carefully lift the hand and let the print dry.
- Add googly eyes at the edge of the hand.
- Glue the circles onto the palm.
- Cut a small yellow triangle for the beak and glue it underneath the eyes.
- Add small paper feet at the bottom of the handprint.
11. Handprint Sunflower
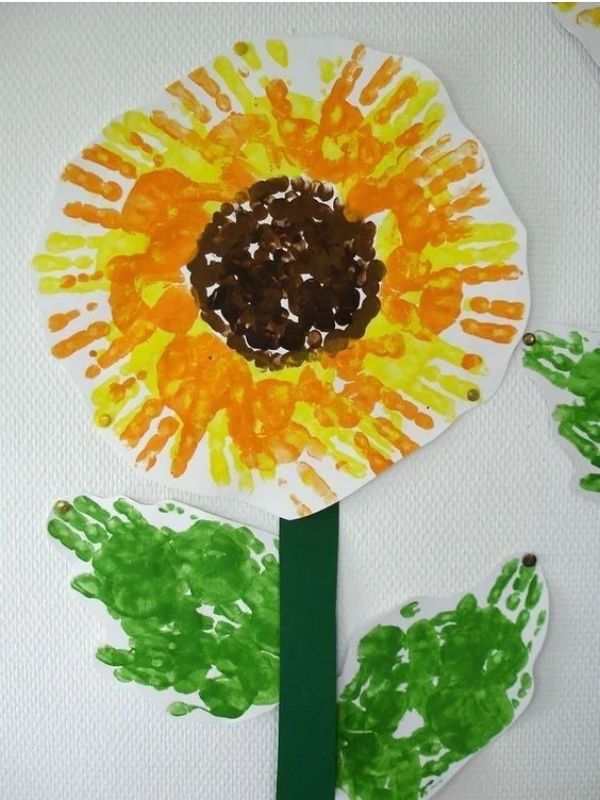
Bright yellow sunflowers fit beautifully into a collection of fall crafts. This handprint sunflower gives toddlers and preschoolers a fun way to create a cheerful flower using their own little hands.
Materials you will need:
- Yellow washable paint
- Brown washable paint
- White cardstock
- Green construction paper
- Paintbrush
- Glue
- Scissors
How to make Handprint Sunflower:
- Paint your child’s palm and fingers with yellow washable paint.
- Press the painted hand onto the cardstock.
- Lift the hand carefully and let the print dry.
- Repeat the process around the same spot to create fuller petals.
- Paint a brown circle in the center of the flower.
- Cut a green stem and leaves from construction paper.
- Glue the stem and leaves underneath the sunflower.
- Add your child’s name and the date to finish the keepsake.
12. Handprint Squirrel
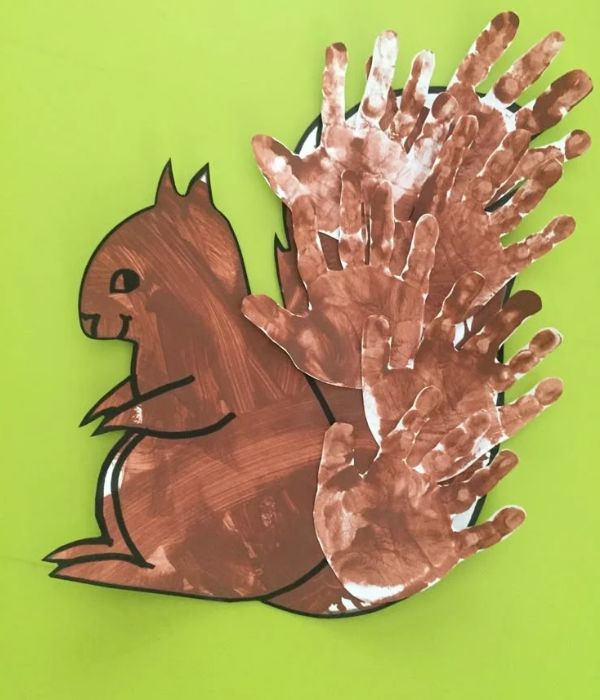
Squirrels are a familiar sight during fall, especially when they are busy gathering nuts for the colder months. This adorable handprint squirrel is a simple way to bring that little woodland friend into your toddler or preschooler’s craft time.
Materials you will need:
- Brown washable paint
- White cardstock
- Brown construction paper
- Squirrel body template
- Glue
- Scissors
- Black marker
- Paintbrush
How to make Handprint Squirrel:
- Paint your child’s palm and fingers with brown washable paint.
- Press the painted hand gently onto the cardstock.
- Carefully lift the hand to create the tail.
- Repeat this about two times.
- Get a squirrel body template and paint it with brown color.
- Glue the handprints toward the end to create the tail.
- Draw a tiny nose, mouth, and feet with a black marker.
13. Handprint Corn
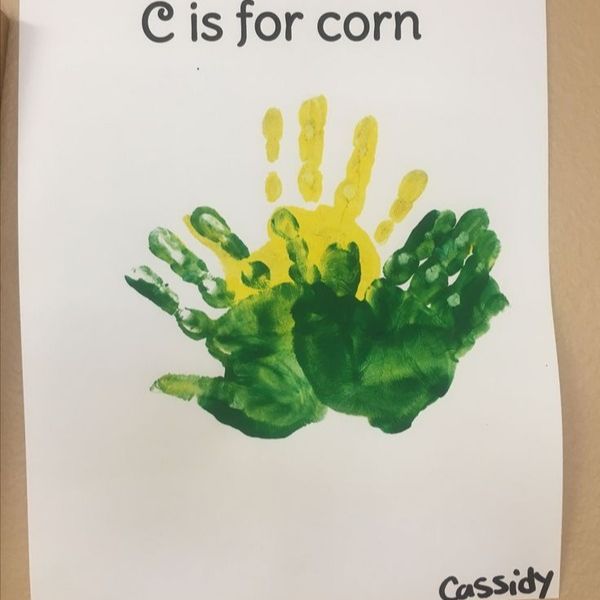
Corn is another fun symbol of the fall harvest, making it a lovely theme for toddler and preschool art. With a little yellow and green paint, your child’s handprint can become a cheerful ear of corn.
This craft is easy, colorful, and gives your little one a chance to learn about foods that are harvested during fall.
Materials you will need:
- Yellow washable paint
- Green washable paint
- White cardstock
How to make Handprint Corn:
- Paint your child’s palm and fingers with yellow washable paint.
- Press the painted hand onto the cardstock.
- Carefully lift the hand and let the print dry completely.
- Paint the two palms with green paint.
- Gently press the painted palms under the yellow one.
- The fingers should be gently spread apart.
- Use a marker to add small dots or lines across the yellow handprint.
- Add a simple brown stem at the bottom if desired.
14. Handprint Fall Wreath
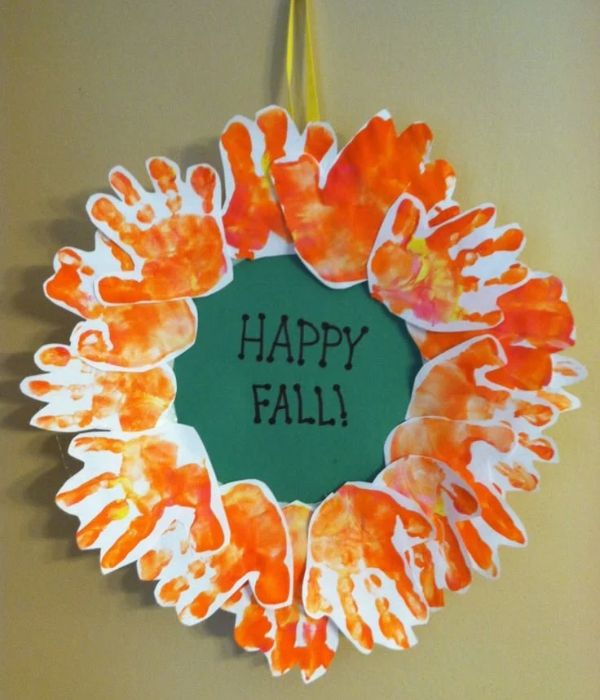
A handprint fall wreath is a beautiful way to bring several autumn colors together in one cheerful craft. Instead of using a traditional wreath shape, you can fill a paper plate or cardboard circle with colorful handprints. Each little handprint becomes part of the wreath, making the finished decoration personal and meaningful.
Materials you will need:
- Orange and yellow washable paint
- White cardstock
- Paper plate or cardboard
- Scissors
- Glue
- Paintbrush
- Black marker
- Ribbon, optional
How to make Handprint Wreath:
- Cut out the center of a paper plate to create a simple wreath base.
- Paint your child’s hand with one of the fall colors.
- Press the painted hand onto a sheet of cardstock.
- Carefully lift the hand and let the print dry.
- Repeat with different autumn colors until you have enough handprints.
- Cut out each dried handprint carefully.
- Arrange the handprints around the wreath base.
- Glue the handprints in place, slightly overlapping them.
- Add a ribbon at the top if you would like to hang the wreath..
15. Handprint Fall Bouquet
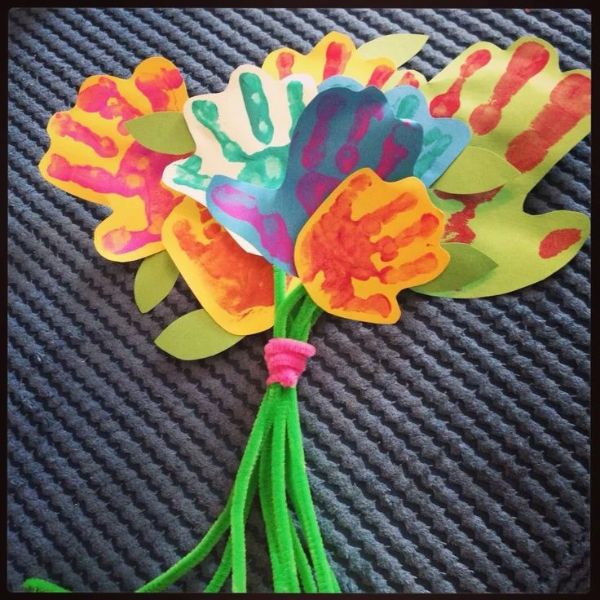
A handprint fall bouquet is a sweet way to turn little hands into a colorful bunch of autumn flowers. It is simple enough for young children and makes a lovely piece of artwork to display at home.
You can use warm fall colors like orange, yellow, red, and brown. Let your child choose the colors and decide how many flowers they want in their bouquet.
Materials you will need:
- Red, orange, yellow, and brown washable paint
- White cardstock
- Green construction paper
- Paintbrush
- Glue
- Scissors
- Black or brown marker
- Ribbon, optional
How to make it:
- Paint your child’s palm and fingers with one of the chosen fall colors.
- Press the painted hand onto the cardstock.
- Carefully lift the hand and let the print dry.
- Repeat with different colors to create several handprint flowers.
- Cut green stems and leaves from construction paper.
- Glue the stems underneath each handprint flower.
- Arrange the flowers together like a bouquet.
- Add the paper leaves around the stems to make the bouquet look fuller.
Tips for Making Fall Handprint Crafts for Toddlers and Preschoolers Less Messy
Handprint crafts are adorable, but we all know that paint and little hands can quickly turn into a messy combination. A little preparation can make the activity much easier and more enjoyable for everyone.
Below are tips that will help you have a less messy crafting section with your little one:
- Lay down newspaper, an old tablecloth, or craft paper before bringing out the paint.
- Choose child-friendly washable paint that cleans up easily from hands and most surfaces.
- Have baby wipes or a damp cloth within reach for quick cleanup between handprints.
- Put your child in an old T-shirt, apron, or clothes you do not mind getting painted.
- Use a small amount of paint, too much paint can make the handprint blurry and create unnecessary mess.
- Keep your paper, paint, scissors, glue, and decorations nearby before starting.
- Work with one color at a time, this helps prevent colors from mixing and keeps little hands easier to manage.
- Give each handprint enough space to dry without touching other artwork.
- Toddlers and Preschoolers can lose interest quickly, so focus on enjoying the process rather than making many crafts.
- Wash your child’s hands as soon as the painting part is finished to prevent paint from spreading around the house.
How to Turn Fall Handprints for toddlers and Preschoolers Into Keepsakes
Fall handprint crafts are more than just cute preschool activities. They can become little reminders of how tiny your child’s hands were during this season of childhood.
With a few simple touches, you can turn those colorful handprints into keepsakes your family will enjoy for years.
- Write your child’s name and age beside the handprint to remember exactly when it was made.
- Adding the month and year makes the artwork even more meaningful when you look back later.
- Add a sweet sentence about what your child enjoyed or said while making the craft.
- Choose one or two special handprints and place them in simple frames for your home.
- Keep several handprint crafts together with photos and little notes from the season.
- Make a yearly collection, create a new fall handprint craft every year and watch how their little hands grow.
- Use the artwork to make thoughtful fall or Thanksgiving cards for grandparents and loved ones.
- Take clear photos of the finished crafts before storing the them safely.
- Store them in a memory box, keep the dried artwork with other childhood treasures from the same year.
Fun Ways to Extend the Learning
Fall handprint crafts can be more than a fun art project. They can also become a simple way to help preschoolers learn through conversation, observation, and play.
You don’t need a formal lesson plan. Just use the craft as an opportunity to explore what your child already knows and introduce something new.
- Talk about fall colors, ask your child to name the colors they see on leaves, pumpkins, apples, and other fall objects.
- Count the fingers on each handprint or count how many leaves, feathers, or petals you created.
- Learn about nature, talk about why leaves change color and what happens to trees during fall.
- Let your child touch safe natural items like leaves, acorns, pinecones, and twigs. This help them to explore different textures.
For more learning activities see:
10 Fun ways to teach the alphabet to preschoolers.
10 low-prep homeschool activities for busy moms.
- Show your child what happens when you mix two paint colors together.
- Introduce simple fall words such as harvest, acorn, squirrel, pumpkin, leaf, and scarecrow. This will help to build their vocabulary.
- Choose an autumn-themed picture book and talk about the characters and illustrations.
- Go on a nature walk to look for the real objects featured in your child’s handprint crafts.
- Ask your child to create a little story about their handprint animal or fall scene.
Tips for Doing Fall Handprint Crafts With toddlers and Preschoolers
Handprint crafts are meant to be fun, not stressful. Preschoolers may get excited, change their minds, or decide that paint belongs everywhere except the paper.
A relaxed approach can make the experience much more enjoyable for both of you.
- Let your child choose colors: Giving them simple choices helps them feel involved in the activity.
- Prepare everything beforehand: Have the paint, paper, decorations, and cleaning supplies ready before you begin.
- Give simple instructions: Explain one step at a time so your preschooler doesn’t feel overwhelmed.
- Let them take the lead: Allow your child to add their own details instead of making every decision for them.
- Don’t rush the process: Give your child time to enjoy painting, pressing, decorating, and exploring.
- Expect some mess: A little paint on their fingers or clothes is part of the fun.
- Take breaks when needed: If your child loses interest, pause the activity and return to it later.
- Praise their effort: Focus on how much fun they had and what they created rather than how it looks.
- Make it a memory: Take a photo of your little artist with their finished craft before putting it away.
Frequently Asked Questions
What are the best fall handprint activities for preschoolers?
Some fun choices include handprint pumpkins, turkeys, leaves, acorns, apples, trees, foxes, owls, squirrels, and sunflowers. You can also make a handprint fall wreath or bouquet when you want a larger project. The best activity is usually one that matches your child’s interests and keeps the process simple enough for their age.
Are handprint crafts suitable for younger preschoolers?
Yes, handprint crafts can be a great activity for younger preschoolers with adult supervision. You may need to help with painting their hands, pressing the print onto paper, and adding small decorations. Keep the instructions simple and give your child plenty of freedom to explore the paint and create their own version.
What paint should I use for fall handprint crafts?
Washable, non-toxic paint made specifically for children is a good choice for preschool handprint crafts. Tempera and washable poster paints can create clear, colorful prints without making the activity unnecessarily complicated. Always check the product label for age recommendations and test a small amount first if your child has sensitive skin.
How can I make handprint crafts less messy?
A little preparation can make a big difference when painting with preschoolers. Cover your table, dress your child in old clothes, and keep wipes or a damp cloth close by. Using a small amount of washable paint can also help you get a clearer print while keeping those little hands from becoming completely covered in paint.
What if my child’s handprint does not come out perfectly?
Don’t worry if the handprint is smudged, uneven, or slightly different from the example. Preschoolers are still developing their coordination, and every little handprint has its own character. You can always add details around the print to turn an imperfect print into part of the finished design.
How can I preserve my child’s fall handprint crafts?
There are several simple ways to preserve these crafts for the future. You can frame your favorites, place them in a scrapbook, or store them safely in a childhood memory box. Adding your child’s name, age, and the date makes the artwork even more meaningful when you look back at it years later.
Can I use these crafts for preschool classroom activities?
Absolutely! Fall handprint crafts can fit nicely into lessons about seasons, colors, animals, nature, and harvest. You can use the activity alongside books, songs, nature walks, or simple counting exercises to make the craft part of a larger learning experience.
How can I make fall handprint crafts more educational?
Use the craft as an opportunity to talk with your child while they create. Ask them to identify colors, count fingers, name animals, describe textures, or talk about what happens to trees during fall. These simple conversations can build vocabulary, observation skills, early math skills, and an understanding of the natural world.
How do I clean paint from my child’s hands after crafting?
Start by wiping away excess paint with a damp cloth or washable wipe before washing their hands with warm water and mild soap. Avoid scrubbing too hard, especially if your child’s skin is sensitive. Following the paint manufacturer’s cleaning instructions can also help you remove any remaining color safely.
Can I turn fall handprint crafts into keepsakes?
Definitely, and this is one of my favorite things about handprint crafts. Add your child’s name, age, and the year to each special piece before storing or displaying it. You can also create a new fall handprint every year and keep them together, giving you a sweet visual reminder of how quickly your child’s little hands have grown.