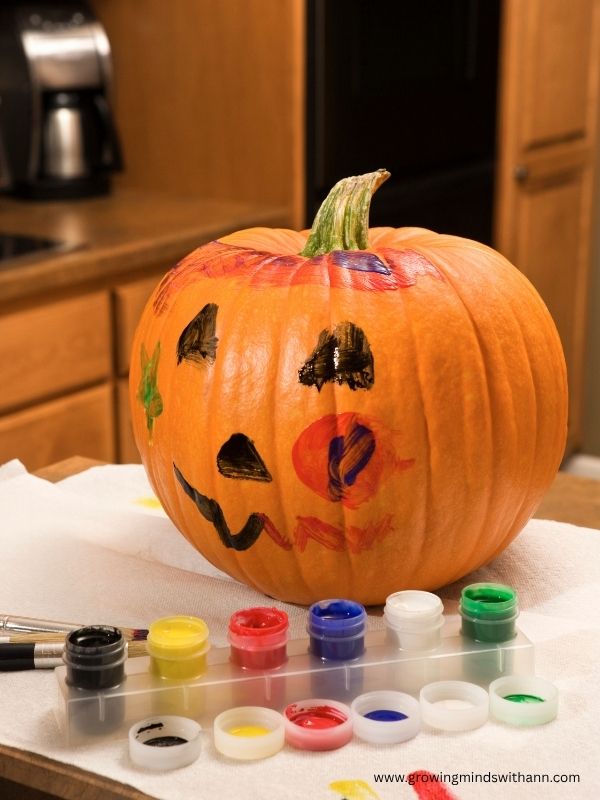
Pumpkin painting for kids is one of those simple fall activities that help kids to get creative while having fun. With just a pumpkin, some paint, and a bit of imagination, children get to express themselves freely while enjoying the cozy feeling of the autumn season.
Watching kids take a plain pumpkin and slowly transform it into their own creation is truly heartwarming. Some children might paint funny faces, others might choose bright patterns or even abstract designs. No matter what they come up with, it always reflects their personality and creativity in a really fun way.
Unlike pumpkin carving, which can be tricky and requires adult help, painting is much easier and safer for younger children. There are no sharp tools involved, so kids can take the lead with more confidence.
Another great thing about pumpkin painting is how flexible it is. Kids can keep it very simple with basic colors and handprints, or they can go all out with detailed designs, stickers, glitter, and layered patterns.
If your children love seasonal activities, you might also enjoy trying these fun harvest crafts for kids together. They pair perfectly with pumpkin painting and help create a full afternoon of creative fall fun. Activities like these are a great way to spend quality time together, and make lasting seasonal memories. These memories can be preserved in your family memory box.
So, gather a few pumpkins, set out the paints, and let your kids’ creativity take over. You might be surprised by just how unique and joyful their little pumpkin creations can be.
Materials Needed for Pumpkin Painting for Kids
Before we dive into the fun pumpkin painting ideas, let’s talk about the materials you’ll need. The supplies will depend on the type of pumpkin painting your child chooses. However, you can start with a few basic materials that work for most designs.
General Materials Needed:
- Pumpkins (small or medium-size)
- Paint (washable, non-toxic paint is better for younger children)
- Paintbrushes (different brush sizes)
- Paint palette (paper plate, or small container)
- Water cup for rinsing paintbrushes between colors.
- Paper towels for cleaning spills and wiping brushes.
- Table covering for protecting table from accidental spills.
- Sponges for creating fun textures, dots, and unique paint patterns.
You don’t need to buy everything on this list before getting started. Simply choose the supplies that match your child’s chosen pumpkin design.
You may also like: best baby playpen for babies and toddlers.
7 clear signs your baby is ready for potty training.
12 Creative Pumpkin Painting Ideas for Kids
1. Rainbow Painted Pumpkin
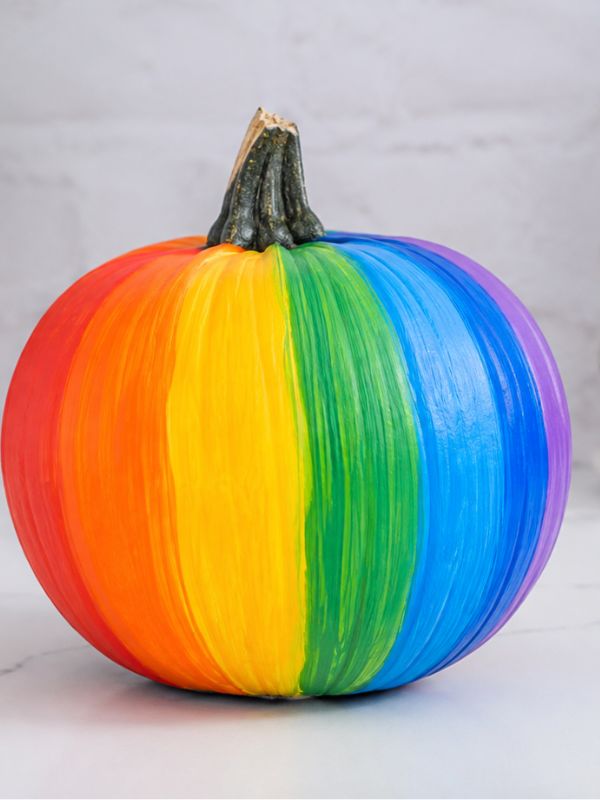
This activity is a cheerful way to bring more colors into your fall decorations. Watch your kids as they use their favorite colors to turn a plain pumpkin into something beautiful.
This idea is simple enough for younger children but still fun for older kids.
How to Make a Rainbow Painted Pumpkin:
- Start with a clean, dry pumpkin.
- Choose several bright rainbow colors for the design.
- Give each child a paintbrush that feels comfortable in their hands.
- Paint each section of the pumpkin with a different color.
- Allow each color to dry before adding another layer.
- Let the finished pumpkin dry completely before displaying it.
2. Polka Dot Pumpkin
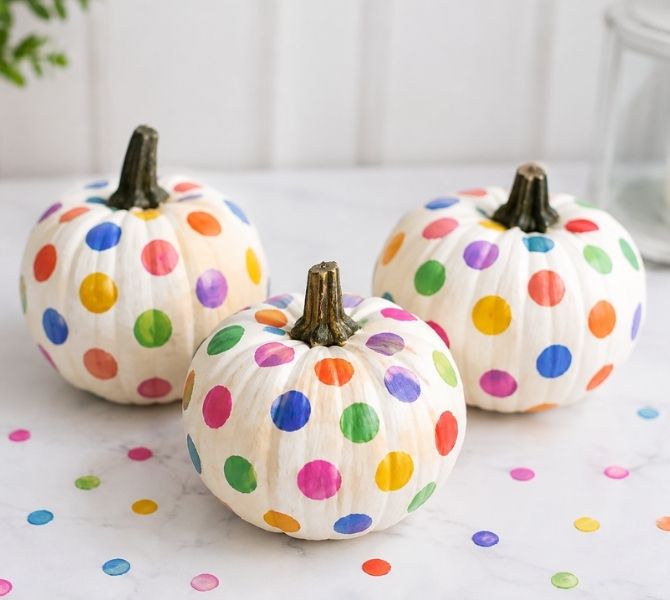
Polka dot pumpkin is a simple and creative fall craft that kids absolutely love. With just a few basic supplies, children can turn an ordinary pumpkin into a bright, playful decoration filled with colorful patterns.
How to Make Polka Dot Pumpkin:
- Clean and dry the pumpkin.
- Choose paint colors.
- Using paint brush, paint the pumpkin with your desired color.
- Select the dot tools you would use (sponge or paintbrush end for large dots, cotton swabs for small dots).
- Dip the chosen tool into paint.
- Press onto pumpkin to make dots.
- Repeat with different colors.
- Arrange dots in any pattern of your choice (rows, random, or mixed).
3. Funny Monster Pumpkins
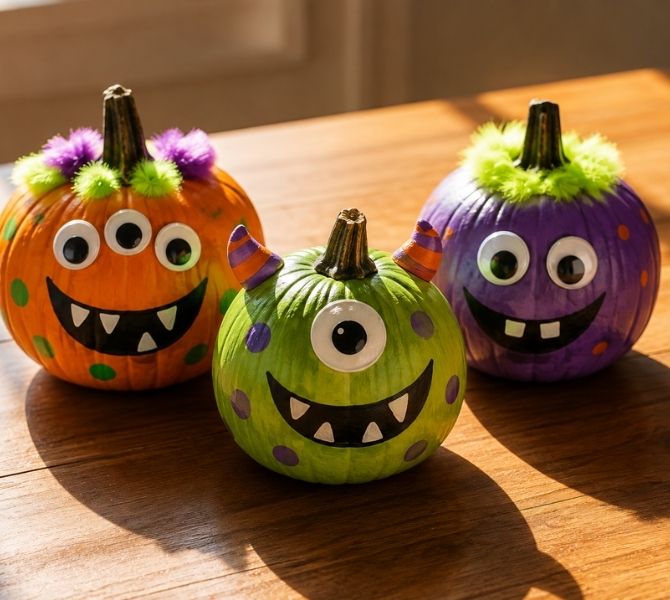
Funny monster pumpkin is perfect for kids who love silly faces, bright colors, and a little bit of spooky fun. Kids love turning pumpkin into a goofy little monster.
Start by letting your child choose a bright color for the pumpkin. Green, purple, blue, orange, and even pink can make adorable monster colors. Once the base coat dries, it is time to bring their funny monster to life.
How to Make Funny Monster Pumpkin:
- Let your kids choose paint colors of their choice (bright colors are recommended).
- Paint the pumpkin in your child’s favorite monster color.
- Let the first coat dry completely before adding more details.
- Use paint or markers to create a silly mouth, nose, and eyebrows.
- Add one, or several funny eyes to make the monster unique.
- Glue on googly eyes if you have them available.
- Add small details like spots, teeth, horns, or colorful hair.
Encourage your child to make the monster as silly as they want. It could have three eyes, a giant smile, tiny teeth, or even a funny hairstyle.
Make your Halloween and that of your baby special with these:
15 Cute Halloween costume ideas for mom and baby.
10 Creative baby carrier Halloween costume ideas.
16 adorable baby’s first Halloween costume ideas you will love.
4. Unicorn Pumpkins
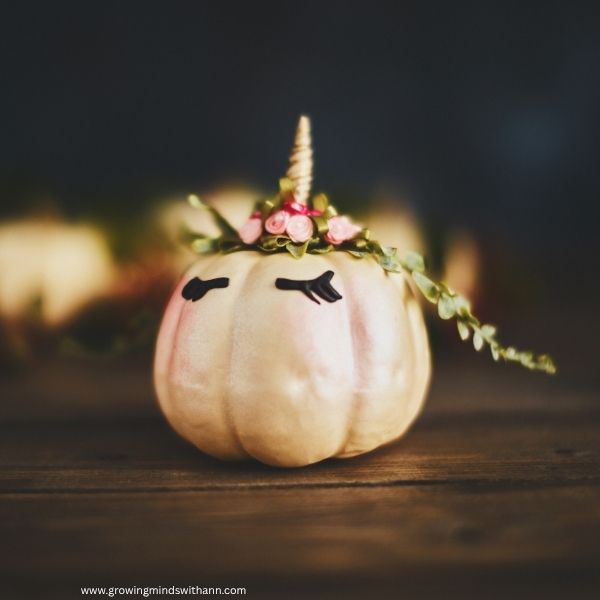
If your little one loves unicorns, this pumpkin idea is sure to bring a big smile to their face. A plain pumpkin can quickly become a magical unicorn with a little paint and imagination.
How To Make Unicorn Pumpkin:
- Start by painting the pumpkin white, pink, or any color your child loves.
- Once the base coat dries, add colorful eyes, rosy cheeks, and a sweet little smile.
- Paint the eyes or use large googly eyes for an easier option.
- Create a unicorn horn using gold, silver, or rainbow colors for a magical finishing touch.
- Add paper ears, colorful flowers, ribbons, or yarn to make a fun mane.
- Let your child choose the colors and decorations for their unicorn.
- Encourage them to name their creation and invent a story about their magical pumpkin friend.
5. Galaxy Painted Pumpkin
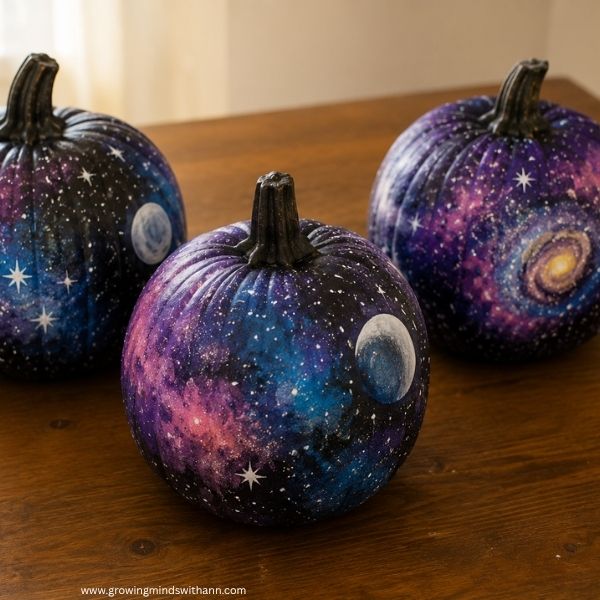
A galaxy-painted pumpkin is a wonderful pick for kids who love stars, space, or anything a little magical. It’s impressive, very simple and fun to make with basic painting steps.
How to Make Galaxy Painted Pumpkin:
- Wash and dry the pumpkin so the paint sticks well.
- Paint the entire pumpkin with a dark base color (black, navy, or deep purple).
- Let the base coat dry completely.
- Use a sponge to gently dab on blue, purple, and pink paint.
- Add small white dots using a cotton swab or paintbrush to make stars.
- Include larger stars, moons, or planets for extra detail if you like.
6. Spooky Ghost Pumpkin
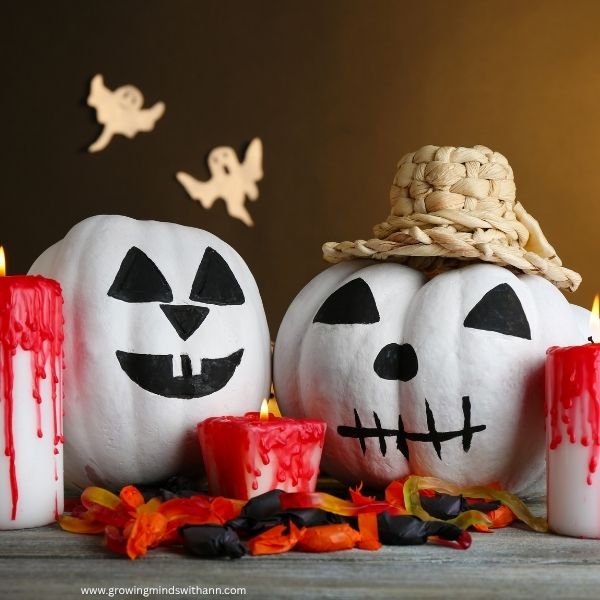
Spooky ghost pumpkin is a fun choice for kids who enjoy Halloween and prefer something scary. They are simple to make and can add a sweet little spooky touch to your fall decorations.
How to Make a Spooky Ghost Pumpkin:
- Start with a clean, dry pumpkin.
- Paint the entire pumpkin white and allow it to dry completely.
- Add two black eyes using paint or a marker.
- Create a small spooky mouth with black paint.
- Add little rosy cheeks if your child wants a friendlier ghost.
- Paint a few tiny stars or dots around the ghost for extra detail.
- Add a black or silver stem to give it a more finished look.
7. Black Cat Pumpkin
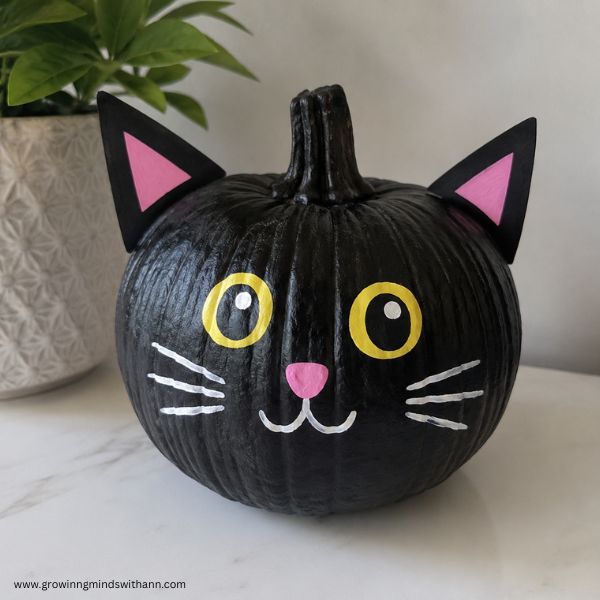
A black cat pumpkin is a cute and slightly spooky idea for kids who love Halloween animals. It is simple enough for little hands while still giving older kids room to add their own details.
How to Make a Black Cat Pumpkin:
- Start with a clean, dry pumpkin.
- Paint the entire pumpkin black and allow it to dry completely.
- Add two large eyes using colorful paint, or googly eyes.
- Paint a small pink or orange nose in the center.
- Draw a sweet little mouth using a thin paintbrush or marker.
- Add whiskers with white paint.
- Create two cat ears using cardstock.
- Attach the ears carefully after the pumpkin has dried.
- Add a small bow, collar, or colorful ribbon for an extra cute touch.
Get these for your kids and you will be glad you did:
20 STEM toys kids actually love for hands-on learning.
Best educational toys for toddlers and preschoolers.
Non-toy gift ideas for elementary kids
8. Monster-Eyed Pumpkins
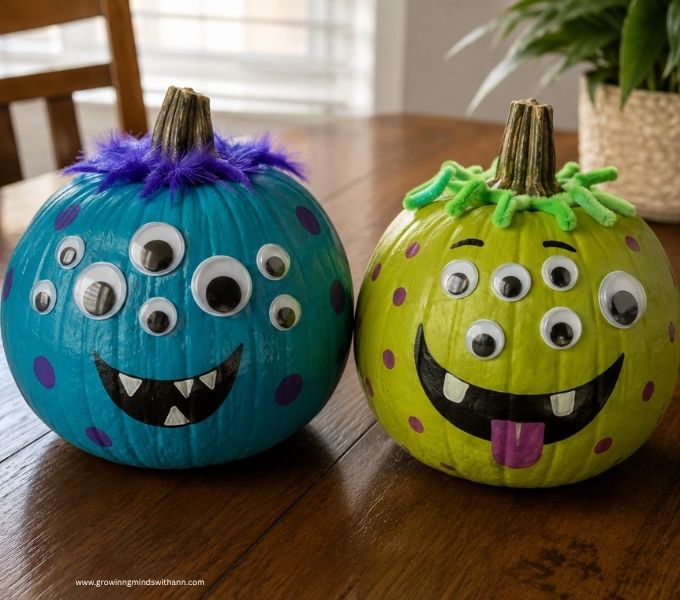
Monster-eyed pumpkins are such a fun idea for kids who enjoy silly and slightly spooky crafts. There are no rules for how many eyes your monster should have.
How to Make Monster-Eyed Pumpkins:
- Start with a clean, dry pumpkin.
- Paint the pumpkin in any color your child likes.
- Let the base coat dry completely.
- Add different-sized eyes using white, yellow, or colorful paint.
- Create black pupils inside each eye.
- Give the monster a funny mouth with a marker.
- Add eyebrows, spots, teeth, or silly hair for extra personality.
- Glue on googly eyes if you want a quick and playful option.
9. Spiderweb Pumpkin
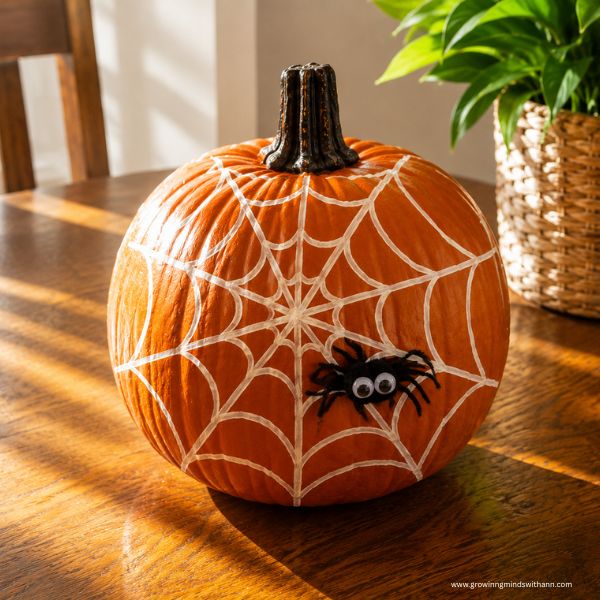
A spiderweb pumpkin is a simple way to add a little spooky fun without making the craft too scary. Kids can enjoy painting the web while adding their own creative touches.
How to Make a Spiderweb Pumpkin:
- Start with a clean, dry pumpkin.
- Paint the pumpkin with any color your child likes.
- Let the base coat dry completely.
- Use white or black paint to draw a simple spiderweb.
- Start with a few lines coming from the center of the pumpkin.
- Connect the lines with curved strokes to create the web.
- Add a small painted spider in the middle or near the web.
- Use googly eyes to give the spider some personality.
10. Glittery Pumpkin
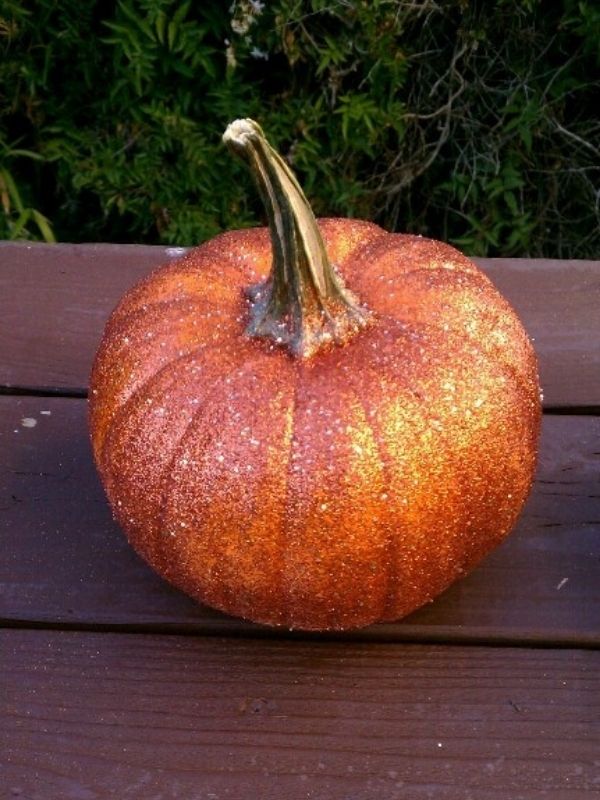
This activity adds a little extra magic to an ordinary pumpkin without making the activity stressful. If you are crafting with younger children, keep the glitter away from their eyes and mouths. You can also use larger decorative glitter pieces for easier cleanup.
How to Make a Glittery Pumpkin:
- Use a clean, dry pumpkin.
- Paint the pumpkin in your child’s favorite color.
- Let the base coat dry completely before adding glitter.
- Brush a thin layer of kid-friendly craft glue over the areas you want to decorate.
- Sprinkle glitter gently over the glue while it is still wet.
- Shake off the extra glitter onto a sheet of paper.
- Add glitter to the stem, stripes, dots, stars, or other simple designs.
11. Candy Corn Pumpkin
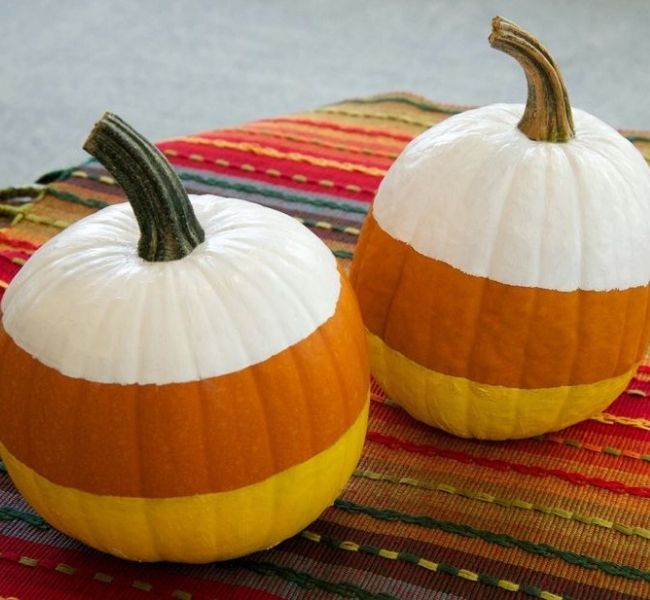
A candy corn pumpkin is a sweet and colorful idea that brings one of Halloween’s favorite treats to life. It is also simple enough for kids to paint without needing much designs.
How to Make a Candy Corn Pumpkin:
- Wash and dry your pumpkin.
- Paint the bottom section bright yellow.
- Paint the middle section orange.
- Paint the top section white.
- Let each color dry before adding another layer.
- Use a small brush to create clean lines between the colors.
- Add a little glitter if your child wants some extra sparkle.
Encourage your kids to try these activities:
13 Ice cream crafts ideas for kids that are cool and creative.
DIY sand tattoos: A simple beach craft for kids
12. Cow Painted Pumpkin
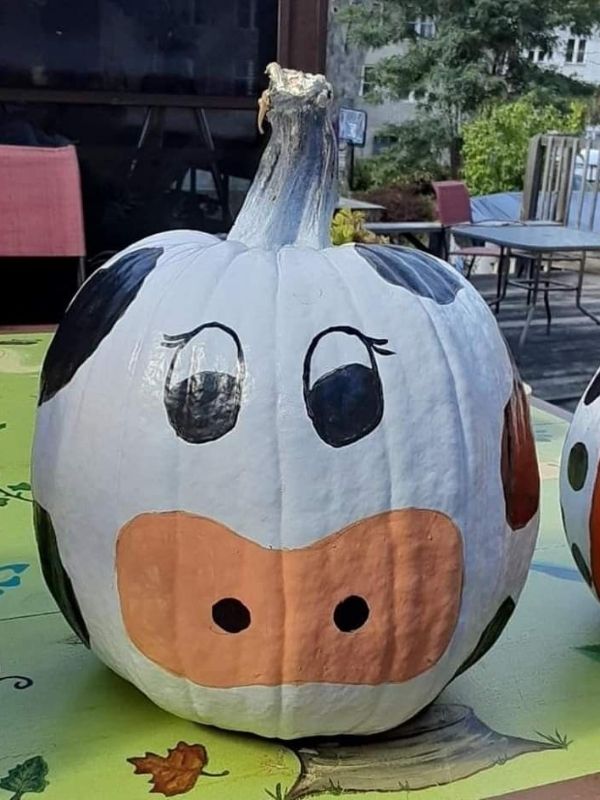
This painting activity is a cute and playful idea for kids who love animals and farm-themed crafts. It is also a fun way to bring a little farmhouse charm into your fall decorations.
How to Make a Cow Painted Pumpkin:
- Start with a clean, dry pumpkin.
- Paint the entire pumpkin white and allow it to dry completely.
- Add irregular black spots around the pumpkin.
- Paint two large eyes for a fun look.
- Add a brown oval for the cow’s nose.
- Use black paint to create two small nostrils.
- Paint a simple smiling mouth underneath the nose.
- Add small cow ears using black craft paper if desired.
- Create little horns using or brown paint.
- Let the pumpkin dry completely before displaying it.
Easy Pumpkin Painting Techniques for Kids
There are many techniques that can be used for pumpkin painting. These techniques are easy and fun, they allow kids to explore colors and textures.
Here are some easy pumpkin painting techniques to try:
- Finger painting
- Sponge painting
- Dot painting
- Brush painting
- Cotton swab painting
- Stencil painting
- Paint pen designs
- Drip painting
- Stamping
- Handprint painting
Pumpkin Painting Ideas for Different Ages
Every child enjoys crafts differently, and their painting abilities change as they grow. That is why it is important to choose pumpkin painting ideas that match their age and skill level.
Toddlers
- Keep designs simple with dots, lines, handprints, and finger painting.
- Let them explore a few washable, non-toxic paint colors.
- Use large brushes or sponges that are easy for little hands to hold.
- Try simple designs like rainbow pumpkins or colorful polka dots.
- Focus more on the experience than the finished pumpkin.
See these for more toddler activities:
Fish bone straw threading activity for toddlers.
Popsicle stick match activities for toddlers.
Masking tape activities for toddlers that are easy and fun.
Preschoolers
- Try funny monster faces, ghost pumpkins, animal pumpkins, and simple patterns.
- Introduce cotton swabs and sponges for different painting techniques.
- Let them choose their own colors and decorations.
- Encourage them to create simple faces or characters.
- Add stickers, googly eyes, or other age-appropriate decorations.
School-Age Kids
- Try more detailed designs like galaxy pumpkins and spiderweb pumpkins.
- Encourage them to create characters, scenes, or creative patterns.
- Let them experiment with blending different paint colors.
- Introduce paint pens for smaller details and outlines.
- Challenge them to design a pumpkin based on their favorite theme.
How to Display Your Painted Pumpkins
After all that painting and creativity, your little artists will be excited to show off their pumpkins. Here are some simple ways to display their colorful creations around your home.
- Place painted pumpkins on the front porch for a cheerful fall welcome.
- Arrange a few pumpkins on your entryway table with other seasonal decorations.
- Use small painted pumpkins as a colorful fall centerpiece on the dining table.
- Let your children display their favorite pumpkins in their bedrooms.
- Create a little pumpkin gallery where everyone can show off their artwork.
- Arrange painted pumpkins on the fireplace mantel with other fall decorations.
- Place smaller pumpkins between books on a shelf for a simple seasonal display.
- Use painted pumpkins as decorations for a kid-friendly Halloween party.
- Display a few pumpkins on a window ledge where natural light can highlight their colors.
- Put everyone’s pumpkins together to create a special family fall display.
Frequently Asked Questions
What kind of paint is best for painting pumpkins?
Acrylic paint works well because it usually gives pumpkins good coverage and bright colors. For younger children, choose non-toxic, child-friendly paint and supervise them during the activity. Washable paint can also be a convenient choice when you want easier cleanup.
Can toddlers paint pumpkins?
Absolutely! Pumpkin painting can be a lovely sensory activity for toddlers. Keep the design simple and give them washable, non-toxic paint and larger brushes or sponges. Finger painting can also be fun, but always supervise toddlers closely during the activity.
How can I keep pumpkin painting from becoming too messy?
Cover your table or floor with newspaper, an old tablecloth, or a washable craft mat. Keep paper towels nearby and give children old clothes or painting aprons to wear. It also helps to put out only the supplies they need instead of giving them everything at once.
How long does painted pumpkin take to dry?
Drying time depends on the type and amount of paint you use. Thin layers usually dry faster than thick coats or heavily decorated pumpkins. Give the pumpkin plenty of time to dry before moving it or adding another layer.
How can I make pumpkin painting more fun for older kids?
Give older children more freedom to choose their own themes and designs. They can try galaxy pumpkins, monster pumpkins, spiderwebs, detailed characters, or creative patterns. You can even turn it into a friendly family challenge where everyone creates their own design.
Can painted pumpkins be displayed outside?
Yes, but their durability depends on the paint and decorations used. Keep them somewhere sheltered from heavy rain and direct moisture whenever possible. For longer outdoor display, choose suitable paint and consider bringing the pumpkins inside during bad weather.
Is pumpkin painting safer than pumpkin carving for kids?
Pumpkin painting is generally easier for young children because it does not require sharp carving tools. Children can take a more active role while adults handle preparation and supervision. It is still important to choose child-safe supplies and supervise younger children throughout the activity.
What should I do with the pumpkins after Halloween?
If the pumpkins are still fresh, you can keep them as fall decorations for a little longer. Once they begin to soften, become moldy, or show signs of spoilage, it is time to dispose of them. You can also consider composting suitable pumpkins if you have access to a composting setup.
Conclusion
Creative pumpkin painting for kids is a simple and fun fall activity that helps children build important skills while expressing their creativity and imagination.
This activity helps develop fine motor skills as children hold brushes, mix paints, and carefully apply details. It encourages problem-solving as they figure out how to turn their ideas into designs, and it strengthens focus and patience as they work on their pumpkins from start to finish.
So, grab some pumpkins, bring out the paint, and enjoy a creative experience that supports learning and makes lasting fall memories together.