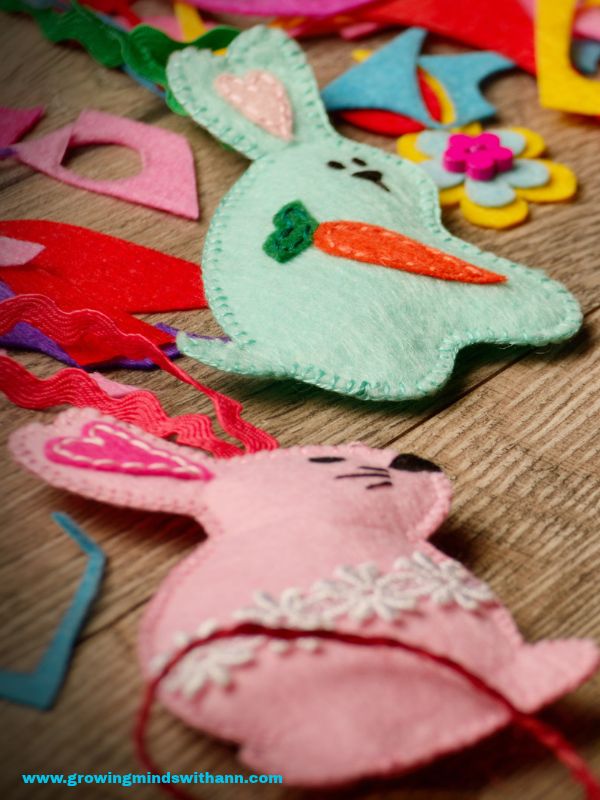
Explore these easy DIY felt baby toys for sensory play, with fun homemade ideas that help babies explore colors, shapes, textures, and early learning through play.
Felt baby toys are soft toys made from felt fabric, making them lightweight and easy for little hands to explore. I love making felt toys for my kids because they are not just fun to play with; they also encourage sensory play and early learning. Babies are naturally curious and enjoy exploring different colors, shapes, and textures as they learn about the world around them.
One thing I love about felt toys is that they are lightweight and do not make much noise when dropped or thrown during playtime. You can also make them at home using affordable materials and simple designs.
If you are looking for creative ways to support your baby’s development without spending much on toys. These DIY felt baby toys for sensory play are worth trying.
In this post, I will share simple felt toy ideas you can make at home. These ideas encourage your baby’s curiosity, exploration, and early learning. Just remember to choose age-appropriate designs, secure every part properly, and supervise your baby during play.
You may also like, 12 healthy homemade baby puree recipes you can freeze.
Benefits of DIY Felt Baby Toys for Sensory Play
Here are some benefits of introducing DIY felt baby toys into your baby’s playtime.
-
Encourages sensory exploration
-
Supports fine motor skill development
-
Helps babies recognize colors and shapes
-
Promotes hand-eye coordination
-
Encourages curiosity and exploration
-
Supports early learning through play
-
Provides affordable playtime options
- Encourages bonding through parent-child play
Materials Needed to Make Felt Baby Toys
One thing I love about making felt baby toys is that you do not need many expensive materials to get started. Most of the supplies are affordable and easy to find in craft stores.
Here are the materials you will need to make your own felt toys at home:
- Felt Fabric
- Needle and thread
- Fabric Scissors
- Soft Stuffing
- Paper and pencil
- Measuring tape or ruler
- Fabric marker
- Embroidery thread
You do not need all these materials for every project. Start with felt fabric, scissors, paper, and thread, then add other supplies depending on the toy you want to make.
Check out these, Healthy finger food ideas for babies 6-12 months.
DIY Felt Baby Toys For Sensory Play
1. Felt animal Shapes
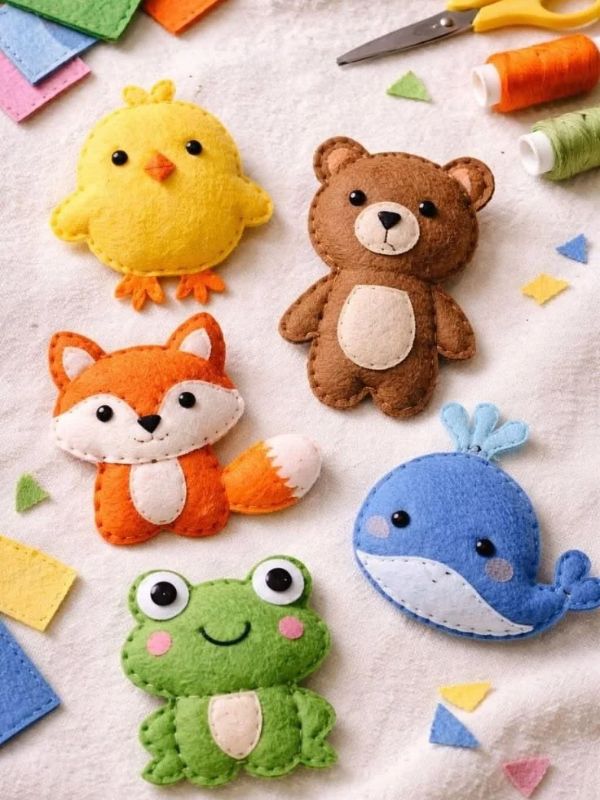
Felt animal shapes are one of the easiest felt baby toys you can make at home. You can create simple animals like rabbits, bears, elephants, and cats using different colors of felt fabric. Babies can explore the colors and shapes while you introduce them to different animals.
How to make felt animal shapes:
1. Start by drawing a simple animal shape on paper. You can choose a rabbit, bear, or any animal you like.
2. Place your pattern on the felt fabric and cut out two matching pieces for each animal.
3. Place the two felt shapes on top of each other and sew around the edges, leaving a small opening if you want to add stuffing.
4. Put a little soft stuffing inside to give the animal a fuller shape, then sew the opening securely.
5. Use embroidery thread to sew simple facial features directly onto the felt. Avoid buttons, beads, or glued-on decorations that could loose.
You can have more fun with this 15 simple activities to do with your baby at home.
2. DIY Felt Sensory Balls
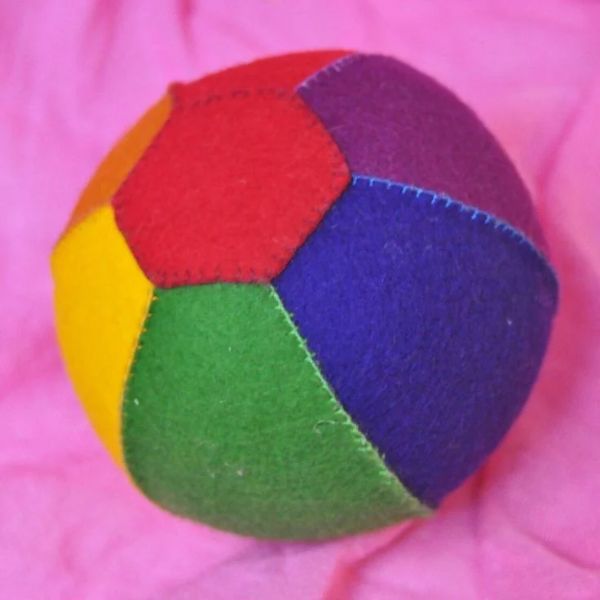
Felt sensory balls are another fun idea to try when making DIY felt baby toys for sensory play. You can combine different colors to help your baby explore colors, shapes, and textures during playtime. They are also lightweight and easy for little hands to hold when made in an appropriate size.
How to make DIY felt sensory balls:
1. Draw and cut out several matching petal-shaped pieces from your felt fabric. You will need enough pieces to form a ball.
2. Place two pieces together and sew along one edge. Continue joining the pieces until they begin to form a rounded shape.
3. Before closing the final seam, add a small amount of soft stuffing to give the ball its shape.
4. Sew the remaining opening carefully, making sure there are no gaps or loose threads.
5. Inspect every seam and make sure the stuffing cannot come out easily.
Safety tip: Babies often explore toys by putting them in their mouths. Make sure the ball is appropriately sized, securely constructed, and free from detachable parts. Homemade felt balls are not automatically safe for mouthing, so supervise your baby closely and inspect the toy before every use.
Capture your baby’s milestone with this 15 creative first year baby photoshoot ideas.
3. Felt Color Matching Cards
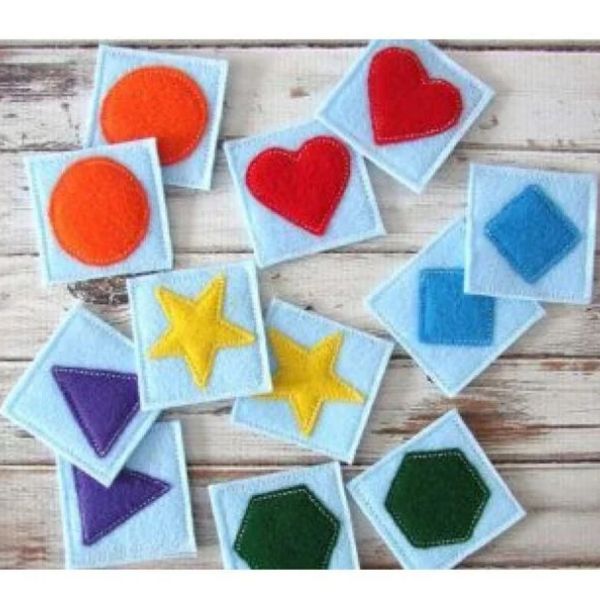
These cards are simple ways to introduce your baby to different colors through play. They are easy to make at home, and you can use felt scraps left over from other projects. As your baby grows, these cards can also become a fun learning activity to help them recognize and match colors.
How to make felt color matching cards:
1. Get thick paper and cut into equal-sized rectangles. Make sure the edges are smooth.
2. Choose a few bright colors of felt fabric and cut two matching shapes from each color of it. For example, you can make two red circles, two blue squares, and two yellow triangles.
3. Secure one shape to each card using stitching or another suitable method that will not come loose during use. Please avoid relying on glue for baby toys.
4. Create two cards for each color or shape so your baby can explore the similarities as they grow.
5. Sit with your baby and show them the cards one at a time. Name each color as you point to it, and encourage your little one to look at or reach toward the cards.
Safety tip: Paper and cardboard cards can become soft, damaged, or torn when babies chew on them. Keep them out of your baby’s mouth, supervise play closely, and remove any card that becomes damaged. For babies who mouth toys, use a more suitable, securely constructed alternative without detachable pieces.
Are you confused on the the type of baby playpen to buy for your little one, this best baby playpen ideas for babies and toddlers will give you inspirations.
4. Homemade Felt Quiet Book
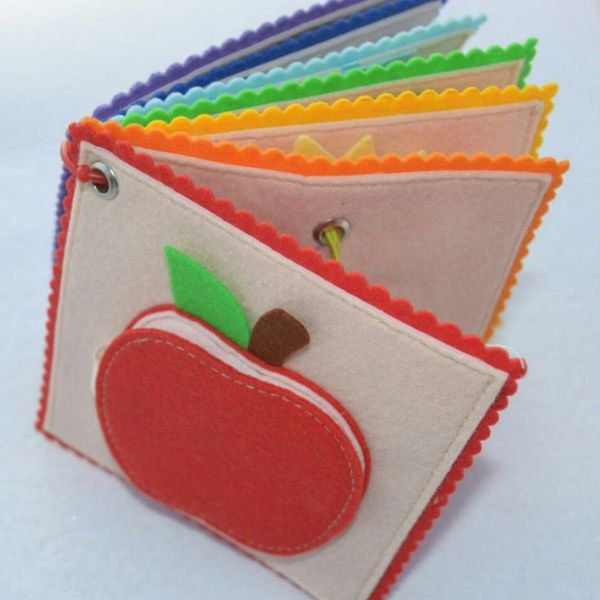
This book is a lovely way to combine playtime and early learning. You can make it with different colors, shapes, and simple activities to keep your little one engaged. You can create pages that introduce animals, colors, numbers, and everyday objects while encouraging your baby to explore at their own pace.
How to make a homemade felt quiet book:
1. Cut your felt fabric into equal-sized squares. You can use two layers for each page to make the book sturdier.
2. Sketch simple pictures and activities on paper before transferring them to the felt. For example, you can draw animals, flowers, shapes, or everyday objects.
3. Use your paper sketches as patterns. Place each pattern on the appropriate felt fabric, trace around it, and carefully cut out the shapes.
4. Arrange the felt shapes on each page and sew them securely in place using a needle and strong thread. Avoid buttons, beads, and other small decorations that could loose.
5. Stack your finished pages and sew them securely along one edge to create a book. Check that there are no loose threads or unfinished edges.
6. Sit with your little one and talk about the pictures, colors, and shapes on each page. You can name the animals, count the shapes, or describe the objects together.
Safety tip: Make sure every piece is securely sewn, with no detachable parts or loose threads. Inspect the book regularly and supervise your baby during play, especially if they tend to put toys in their mouths.
You can also see, best educational toys for toddlers and preschoolers.
5. Felt Fruit and Vegetable Toys
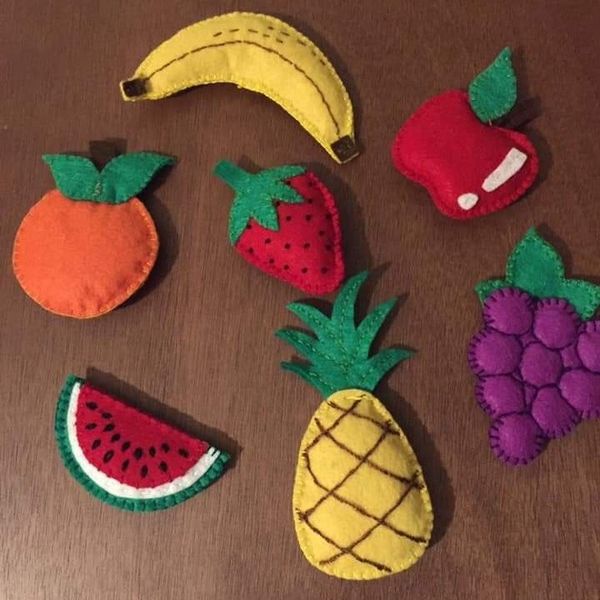
Felt fruit and vegetable toys are another fun idea to include in your DIY felt baby toys collection. You can make colorful felt apples, bananas, carrots, strawberries, and other familiar foods. I love that you can use different colors of felt fabric to make each fruit or vegetable look more realistic while helping your little one explore colors and shapes through play.
How to make felt fruit and vegetable toys:
1. Start by sketching simple fruit and vegetable shapes on paper. You can draw an apple, banana, carrot, strawberry, or any other food you want to make.
2. Select felt fabric that matches each fruit or vegetable. For example, use red or green for apples, yellow for bananas, orange for carrots, and red for strawberries. You can also use green felt for leaves and brown felt for stems.
3. Place each paper pattern on the corresponding felt fabric and cut out two matching pieces for the main shape. Cut additional pieces from other colors for details such as leaves, stems, or strawberry seeds.
4. Before joining the main pieces, sew the additional felt details onto the front piece. For example, attach green felt leaves to a strawberry or apple, and use small embroidered stitches to create strawberry seeds. This helps the fruits and vegetables look more recognizable.
5. Place the two matching felt shapes together and sew around the edges, leaving a small opening for stuffing.
6. Put a little soft stuffing inside to give each fruit or vegetable a fuller shape. Then sew the opening closed securely, making sure there are no gaps or loose threads.
Safety tip: Make the toys large enough to reduce choking risks, and sew all details securely in place. Avoid small parts that could detach, and inspect the toys regularly for loose seams or exposed stuffing.
Are wondering how to know when to start potty training your child, this 7 clear signs your toddler is ready for potty training will answer your questions.
6. DIY Felt Stacking Shapes
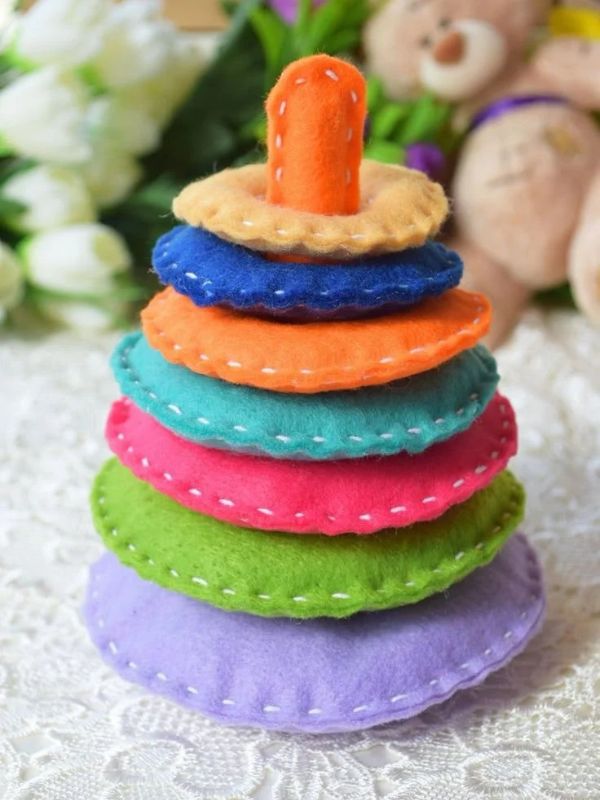
DIY felt stacking shapes are a fun way to introduce your baby to different sizes while encouraging hand-eye coordination and early problem-solving skills. You can make felt circles in different sizes and use a soft felt-covered stick as the center support for stacking.
How to make DIY felt stacking shapes:
1. Draw several circles on paper in different sizes, from small to large. These will be your stacking pieces.
2. Select different colors of felt fabric for each circle to make the toy more attractive and help your baby notice the differences.
3. Use your paper patterns to cut two matching felt circles for each size. Cut a small center opening in each circle, sized to fit the stacking post safely.
4. Place each pair of matching circles together and sew around the edges, leaving a small opening. Add a little soft stuffing if desired, then close the opening securely. Keep the center opening clear so the circles can slide onto the post.
5. Use a purpose-made, infant-safe stacking post with a stable base. Avoid using a loose stick, a sharp dowel, or a homemade post that could break or injure your baby. Simply covering a stick with felt does not make it safe for infant play.
6. Once everything is ready, demonstrate how to place the circles onto the post, starting with the largest and ending with the smallest. Stay with your baby and help them explore the toy.
You will also enjoy, 24 LEGO set ideas for kids of all ages.
7. Felt Fish Toys
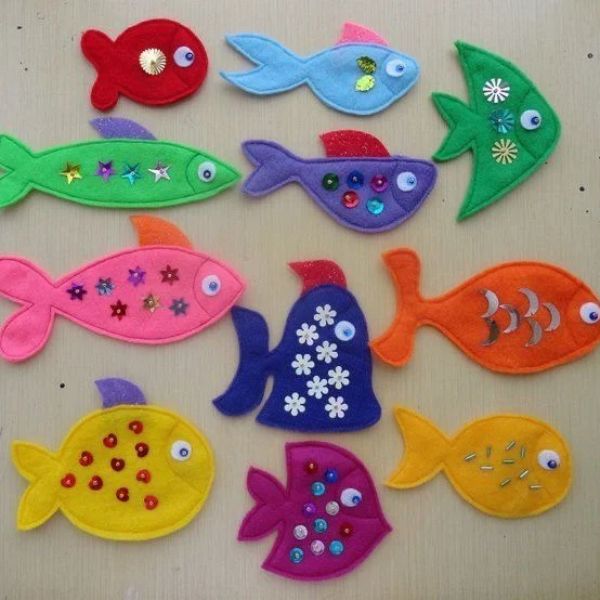
Felt fish toys are another cute idea to try when making DIY felt baby toys for sensory play. You can make them in different colors and sizes to help your little one explore colors and shapes during playtime. You can use simple fish patterns and colorful felt fabric to create these toys at home.
How to make felt fish toys:
1. Start by drawing simple fish shapes on paper. Include the body, tail, and fins in your design.
2. Pick the colors you want to use for your fish. For example, you can use blue for the body, yellow for the fins, and orange for the tail.
3. Place your paper pattern on the felt fabric and cut out two matching fish shapes. Then cut out the fins, tail, and other details from felt in different colors.
4. Before joining the main pieces, sew the fins and tail securely onto one fish shape. You can also add small felt patches to create colorful scales. For the eyes, use embroidery thread to sew a simple eye directly onto the fabric instead of attaching a button or bead.
5. Place the two fish shapes together and sew around the edges, leaving a small opening. If you want a soft, padded fish, add a little stuffing before sewing the opening.
6. Repeat the steps to create fish in different colors. You can use them to introduce your baby to colors and simple words during supervised play.
Safety tip: Make sure all fins, tails, and other details are securely sewn, with no loose threads or exposed stuffing. Avoid detachable parts and inspect the toys regularly.
You will find these article helpful when your baby becomes a toddler;
Masking tape activities for toddlers that are easy and fun.
Popsicle stick activities for toddlers.
Fish bone straw threading activities for toddlers.
8. Felt Alphabet Shapes
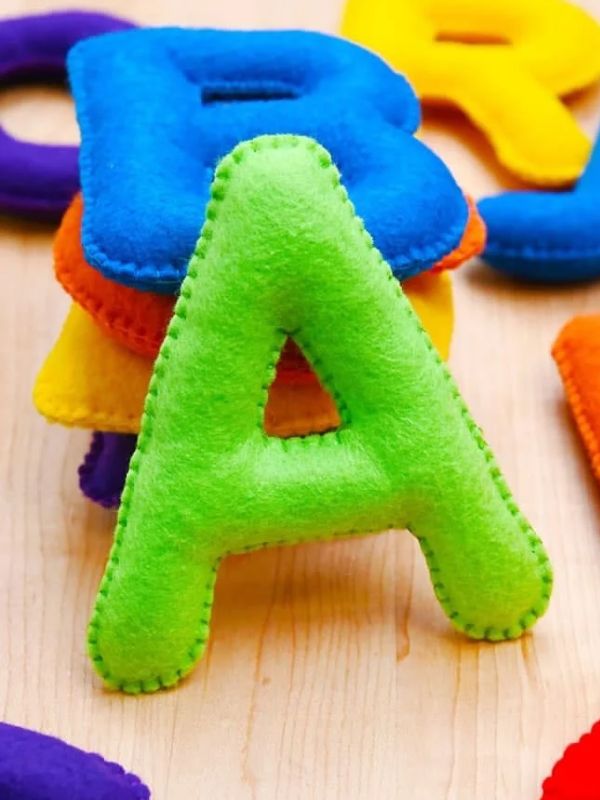
Felt alphabet shapes are a simple way to introduce your little one to letters while making playtime fun. You can make the letters using different colors of felt fabric and use them to introduce the alphabet gradually. These toys combine sensory play with early learning, helping babies become familiar with letters long before they start reading.
How to make felt alphabet shapes:
1. Start by writing large alphabet letters on paper. You can begin with the letters in your baby’s name or start with A, B, and C.
2. Select different colors of felt fabric for the letters. For example, you can make A green, B blue, and C yellow.
3. Place your paper patterns on the felt fabric and cut out two matching pieces for each letter. Make sure the letters are large enough for your baby to explore safely.
4. Place the matching felt pieces together and sew around the edges. If you want the letters to feel padded, add a little soft stuffing before closing the seams securely.
5. Repeat the steps to create additional letters until you have a small alphabet collection. Check each letter carefully to ensure there are no loose threads or open seams.
Safety tip: Avoid making the letters too small, and ensure all seams are secure with no loose threads or exposed stuffing.
9. Felt Peekaboo Toy
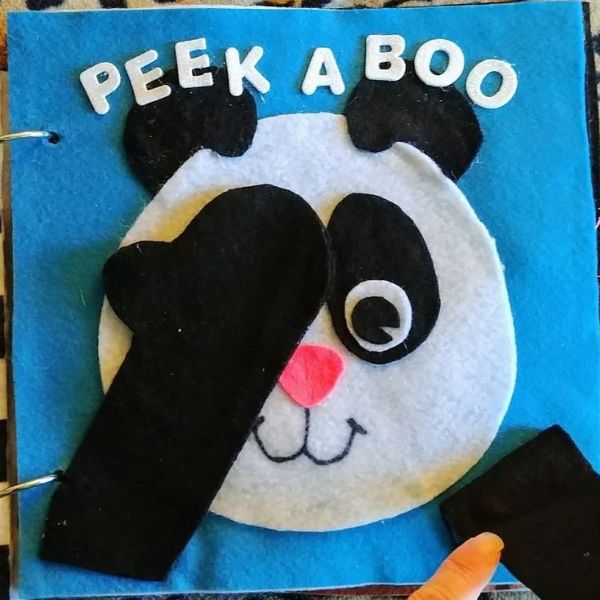
Peekaboo is one of those simple games that can make babies smile during playtime. You can turn this familiar game into a fun DIY felt toy by creating a cute animal face, that hides behind a felt flap. I love that this toy because it encourages curiosity and gives you another way to bond with your little.
How to make a felt peekaboo toy:
1. Cut a large square from felt fabric to serve as the base of your toy. Choose a color that contrasts with the animal face.
2. Sketch the face of any animal of your choice on paper. Keep the design easy, with a rounded head, small ears, and simple facial features.
3. Use your paper pattern to cut two matching pieces for the animal’s head. Cut additional felt pieces for details, such as round ears and patches around the eyes for a panda.
4. Before joining the two head pieces, sew the smaller felt details securely onto the front piece. Use embroidery thread to stitch the eyes, nose, and mouth directly onto the fabric. Avoid buttons, beads, or other detachable parts.
5. Place the finished animal face on the base and sew it securely in place. Make sure the stitching is strong and there are no loose threads.
6. Cut a piece of felt large enough to cover the animal’s face. Attach it above the face by sewing along one edge so it lifts like a little door. Check that the flap stays securely attached and opens easily.
10. Felt Number Toys
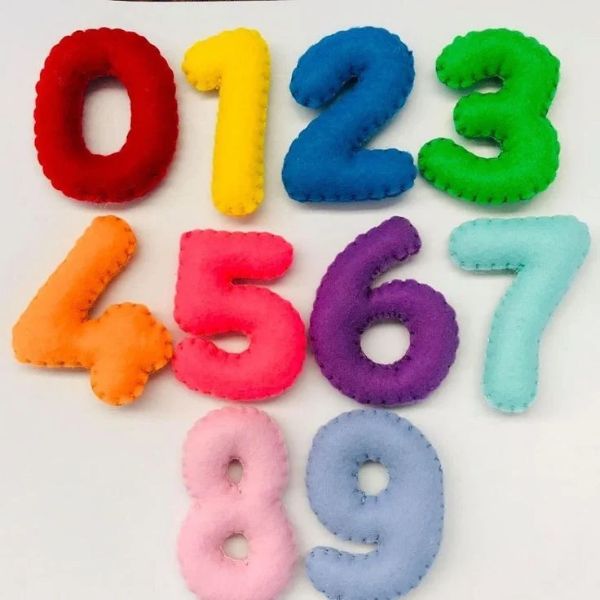
Felt number toys are a fun way to introduce your little one to numbers through play. You can make them at home using different colors of felt fabric, creating soft numbers that babies and toddlers can explore.
How to make felt number toys:
1. Write numbers from 0 to 9 on paper. Make each number large and simple so it is easy to recognize.
2. Pick different colors for your numbers. For example, you can make 1 red, 2 blue, 3 yellow, and 4 green.
3. Place each paper pattern on the felt fabric and cut out two matching pieces for every number.
4. Place the matching pieces together and sew around the edges using a needle and strong thread. If you want padded numbers, add a little soft stuffing before closing the seams securely.
5. Repeat the steps until you have numbers from 0 to 9. Check each number carefully to ensure there are no loose threads or open seams.
Safety tip: Make the numbers large enough to reduce choking risks, and ensure all seams are securely sewn. Avoid detachable decorations and inspect the toys regularly for loose threads or exposed stuffing.
How to Choose Felt Toys for Different Baby Ages
When making DIY felt baby toys for sensory play, it is important to consider your baby’s age and stage of development. Babies learn and explore in different ways as they grow, so I always recommend choosing simple designs that match your little one’s abilities.
Here are some ideas to help you choose suitable felt toys for different baby ages.
Felt Toys for Babies 0–3 Months
At this age, babies are still developing their vision and responding to sounds and movement around them. You can introduce simple, high-contrast felt shapes for your baby to look at during supervised interaction. Black-and-white patterns or large, colorful shapes can make visual exploration more interesting.
Felt Toys for Babies 3–6 Months
Babies in this age group are becoming more interested in reaching for and touching objects. Large, securely constructed felt shapes in different colors can provide opportunities for supervised sensory exploration. You can also show your baby simple animal shapes while naming their colors and features.
Felt Toys for Babies 6–12 Months
As babies grow, many begin grasping objects more confidently and exploring them with their mouths. Large, soft felt toys with securely sewn seams may offer opportunities to explore shapes, colors, and textures. However, homemade felt toys are not automatically safe for mouthing, so choose only designs appropriate for your baby’s abilities and supervise closely.
Felt Toys for Babies 12 Months and Older
Older babies and toddlers are often ready to explore simple activities involving colors, shapes, and familiar objects. You can introduce felt animal toys, large alphabet shapes, or simple number toys during supervised play. These activities can help you introduce early learning concepts while allowing your child to explore at their own pace.
A little reminder: I want you to know that every baby develops differently, so use your child’s abilities as a guide rather than relying on age alone. Always make sure toys are securely made, free from detachable pieces, and appropriate for your child’s stage of development. For babies who mouth objects, use toys specifically designed for that purpose rather than assuming homemade felt toys are safe.
Frequently Asked Questions
1. Are felt toys good for babies?
Yes, felt toys are very good for babies. They can encourage sensory exploration and early learning when they are designed appropriately for a baby’s age. They can also help introduce colors, shapes, and familiar objects while making playtime enjoyable. However, homemade felt toys are not automatically safe for every baby, especially those who put toys in their mouths.
2. What kind of felt is best for making baby toys?
Choose soft, durable felt fabric that is suitable for the intended use. Make sure the material is clean and free from strong chemical odors. Since babies may chew on their toys, choose materials specifically intended for baby products rather than assuming ordinary craft felt is safe for mouthing.
3. Can I make felt baby toys at home without a sewing machine?
Yes, you must not have sewing machine before you make felt toys. You can make many felt toys using a needle and strong thread. Simple designs, such as felt animal shapes, flowers, and alphabet pieces, can be sewn by hand. Take your time to secure the seams properly and check for loose threads before allowing your baby to play.
4. Are homemade felt toys safe for newborns?
Not all homemade felt toys are suitable for newborns. Newborns can benefit from supervised visual activities, but any toy offered to them must be age-appropriate and free from loose parts, long threads, and other hazards. For newborns, use products specifically designed for their age and follow the manufacturer’s safety guidance.
5. How do I clean DIY felt baby toys?
Cleaning depends on the type of felt and how the toy is constructed. Check the fabric’s care instructions first. Some felt toys can be gently spot-cleaned with a damp cloth and mild soap, while others may be damaged by soaking or machine washing. Allow the toy to dry completely before use, and discard it if the stuffing becomes damp, the seams weaken, or the material deteriorates.
6. What are the easiest felt toys to make for babies?
Felt animal shapes, simple flower shapes, and large felt sensory balls are good projects to start with. They require only a few materials and can be made using basic cutting and sewing skills. Choose simple designs without detachable decorations, and always supervise your baby during play.
Conclusion
Making DIY felt baby toys for sensory play is a lovely way to combine fun and early learning at home. You can create different toys using affordable materials while giving your little one opportunities to explore colors, shapes, and textures.
You do not need to make everything at once; start with a simple design and add more as you go. Remember to choose age-appropriate materials, secure every piece properly, and supervise your baby during play. Sometimes, the simplest play ideas create wonderful opportunities for learning and bonding with your little one.