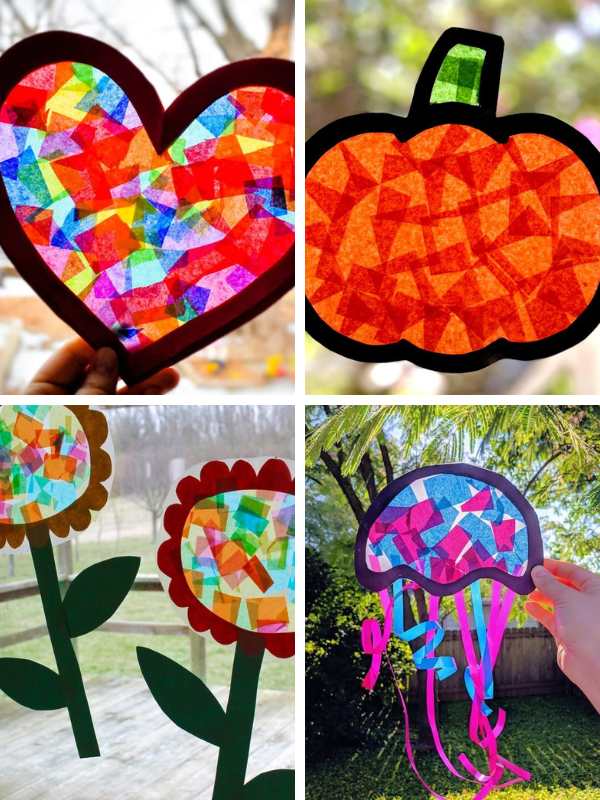
Sun catcher crafts for kids have a special kind of charm. They are simple, colorful, and just a little bit magical in the way they come to life when the light hits them. I always love seeing kids get excited over something so easy to make, especially when they realize their artwork can actually glow in the window.
These sun catcher crafts work beautifully on a slow afternoon, during a rainy day, or anytime you need a calm activity that still feels fun and creative. They are also a lovely choice for classrooms, homeschool mornings, or weekend crafting at home. Kids get to play with color, practice cutting and gluing, and make something they will want to hang up right away.
Here, you will find a mix of easy sun catcher crafts for kids that are perfect for toddlers, preschoolers, and older children too. Some use tissue paper, some bring in nature-inspired materials, and others are perfect for different seasons and holidays. Whether you want something quick and low-mess or a project that feels a little more special, there is a sun catcher idea here that your kids will enjoy making.
If your little ones love bright, cheerful projects, you may also want to check out 16 cute sun crafts for kids. It’s full of sunny, happy ideas that pair perfectly with these colorful sun catcher crafts.
Beautiful Sun Catcher Craft Ideas For Kids
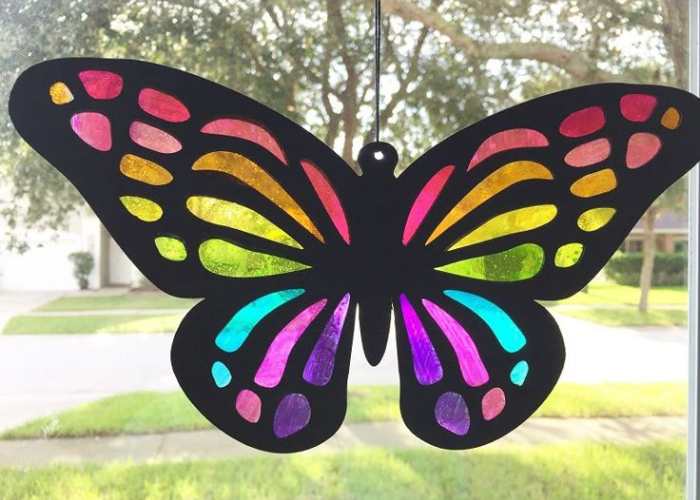
1. Butterfly Sun Catcher
Butterfly sun catchers are one of those crafts that instantly brighten a room. Kids love choosing different colors for the wings and watching them glow when the sunlight shines through. This craft is perfect for spring, insect units, or simply adding a cheerful decoration to your windows.
Materials Needed:
- Black cardstock or construction paper
- Contact paper
- Colored tissue paper
- Child-safe scissors
- Pencil
- Ribbon
Procedure:
- Draw and cut out a butterfly shape from black cardstock, leaving the center of the wings open. Alternatively, you can use butterfly template.
- Attach a piece of contact paper to the back of the butterfly frame.
- Cut the tissue paper into small pieces.
- Let your child stick the colorful pieces of tissue paper onto the contact paper until the wings are filled.
- Cover the front with another sheet of contact paper if you want to seal the design.
- Trim away any excess contact paper around the edges.
- Punch a hole at the top, thread a ribbon through it, and hang the butterfly in a sunny window.
If your little ones enjoy colorful seasonal crafts like this, they will also love my Cute 16 Sun Crafts for Preschoolers for even more bright and cheerful ideas.
2. Apple Sun Catcher
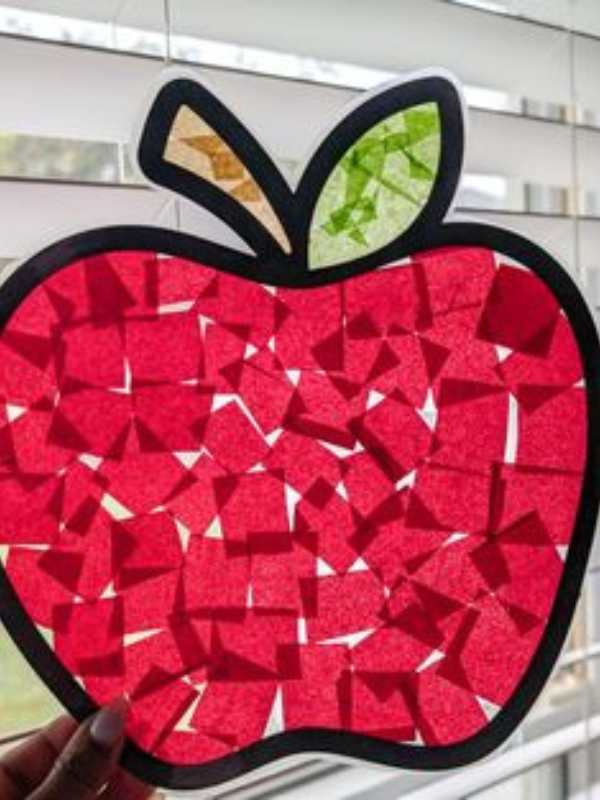
An apple sun catcher is a wonderful craft for back-to-school season, apple-themed lessons, or fall afternoons at home. It’s simple to make, uses just a few materials, and creates a colorful decoration that looks beautiful hanging in a sunny window.
Materials needed:
- Construction paper
- Contact paper
- Red, green, or yellow tissue paper
- Child-safe scissors
- Pencil
- Brown and green cardstock (for the stem and leaf)
- Ribbon or string
Procedure:
- Draw and cut out an apple shape, leaving the center open to create a frame.
- Attach contact paper to the back of the apple frame.
- Cut the tissue paper into small pieces.
- Fill the center of the apple with the colorful tissue paper pieces.
- Add a brown stem and a green leaf to complete the design.
- Seal the front with another sheet of contact paper if desired.
- Trim the edges neatly.
- Punch a hole at the top, thread a ribbon through it, and hang the finished apple sun catcher in a sunny window.
If you are looking for more creative projects to enjoy throughout the warmer months, don’t miss my creative DIY summer crafts for kids for plenty of fun inspiration.
3. Snowflake Sun Catcher
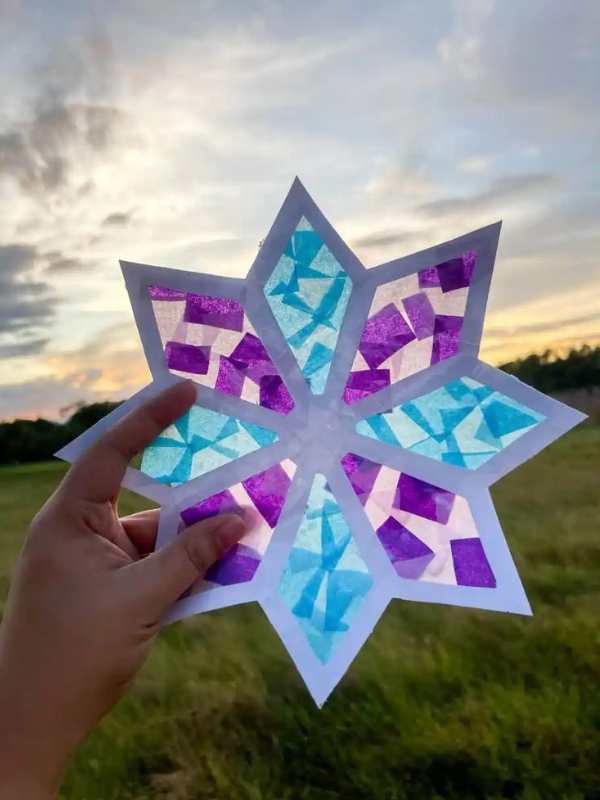
This craft brings a little bit of winter wonder indoors. Even if you don’t live somewhere that gets snow, kids will have fun creating their own sparkling designs and watching them catch the light in the window. It’s a cozy activity for chilly afternoons, winter classroom parties, or a festive homeschool craft day.
Materials Needed:
- White or light blue cardstock
- Contact paper
- White, silver, and light blue tissue paper
- Child-safe scissors
- Pencil
- Ribbon
Procedure:
- Draw and cut out a large snowflake shape, leaving the center open to create a frame.
- Attach a sheet of contact paper to the back of the snowflake.
- Tear the tissue paper into small pieces.
- Let your child fill the center of the snowflake with the colorful tissue paper pieces.
- Seal the front with another sheet of contact paper if desired.
- Trim away any excess contact paper around the edges.
- Punch a hole at the top, thread a ribbon through it, and hang the finished snowflake in a sunny window.
For other snow themed creative activities see fun screen-free snow day activities for toddlers.
4. Leaf Sun Catcher
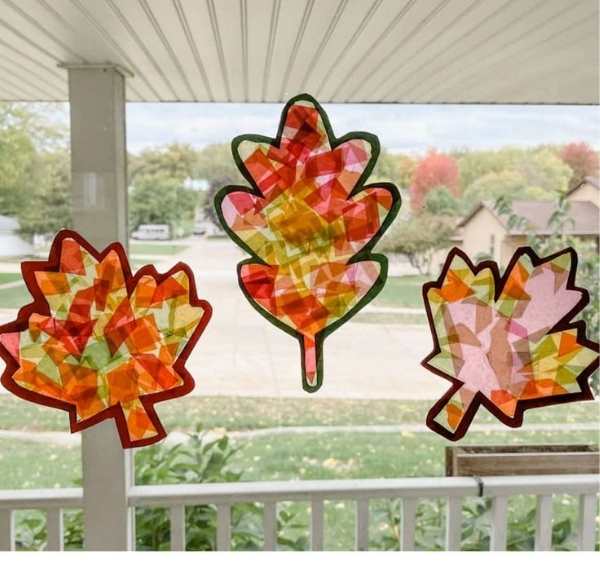
As the leaves are changing colors, kids love collecting them and turning them into beautiful window decorations. It’s a wonderful way to combine nature exploration with creativity while encouraging kids to slow down and notice the beauty around them.
Materials Needed:
- Brown construction paper
- Contact paper
- Colorful tissue paper
- Child-safe scissors
- Pencil
- Ribbon
Procedure:
- Draw and cut out a large leaf shape from construction paper, leaving the center open.
- Attach a sheet of contact paper to the back of the leaf frame.
- Cut the tissue paper into small pieces.
- Fill the center of the leaf with the colorful pieces.
- If you’d like, add a few small pressed leaves for a natural touch.
- Seal the front with another sheet of contact paper if desired.
- Trim away any excess contact paper around the edges.
- Punch a hole at the top, thread a ribbon through it, and hang the finished leaf in a sunny window.
For another hands-on activity that encourages creativity and fine motor skills, be sure to check out my Fish Bones Straw Threading Activity, which is another fun project kids love.
5. Heart Sun Catcher
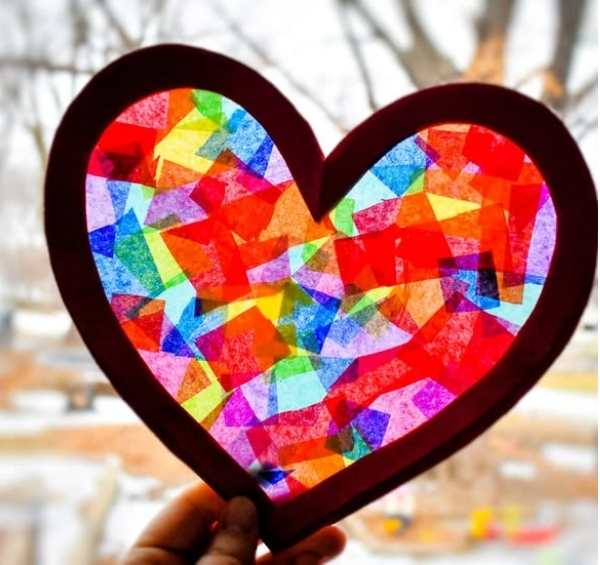
A heart-shaped craft is a simple way to spread a little kindness and color at the same time. Whether you’re celebrating Valentine’s Day, Mother’s Day, or simply want to make something special for a loved one, this project gives children a chance to create a heartfelt keepsake they will be proud to share. It’s easy enough for younger kids but still enjoyable for older children who like adding their own creative touches.
Materials Needed:
- Construction paper
- Contact paper
- Tissue paper
- Child-safe scissors
- Pencil
- Ribbon
Procedure:
- Draw a heart shape and cut out the outline from construction paper.
- Attach a sheet of contact paper to the back of the heart.
- Cut the tissue paper into small pieces.
- Guide your child fill the center of the heart with colorful pieces until it’s completely covered.
- Seal the front with another sheet of contact paper.
- Trim the excess contact paper around the edges.
- Punch a hole at the top and thread a ribbon through it.
- Hang the finished heart sun catcher in a sunny window to let the colors shine.
Children love making gifts that come straight from the heart, and this craft is a wonderful way to do just that. For more of this see fun and simple valentine crafts for kids.
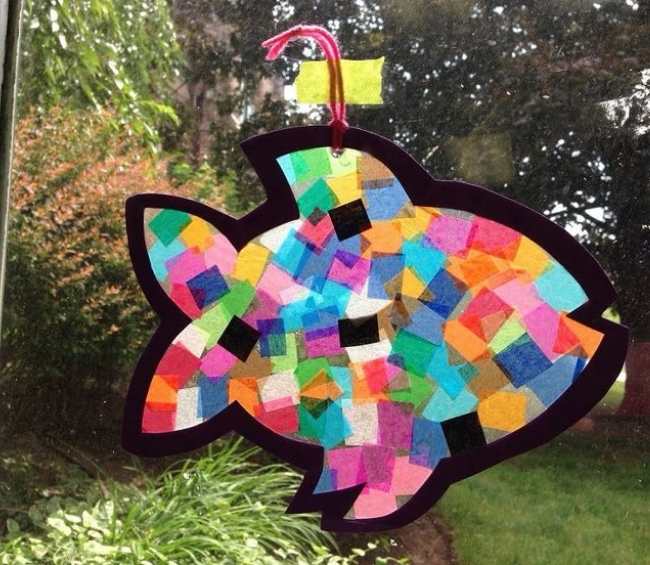
6. Fish Sun Catcher
Kids always have so much fun creating a colorful fish that lights up beautifully in the sunshine. It’s a great activity for summer, ocean unit studies, or an afternoon when you are looking for an easy craft that keeps little hands busy.
Materials Needed:
- Black cardstock
- Contact paper
- Different colors of tissue paper
- Child-safe scissors
- Pencil
- Ribbon
Procedure:
- Draw a fish and cut out the outline from the cardstock.
- Attach a sheet of contact paper to the back of the fish.
- Tear the tissue paper into small pieces.
- Fill the center of the fish with colorful pieces, mixing different colors to create bright scales.
- Seal the front with another sheet of contact paper if desired.
- Trim away any excess contact paper around the edges.
- Punch a hole at the top, thread a ribbon through it, and hang the fish in a sunny window.
If your children enjoy sea-life projects, they will also have fun trying my Fish Bones Straw Threading Activity, which is another engaging way to build fine motor skills while exploring an ocean theme.
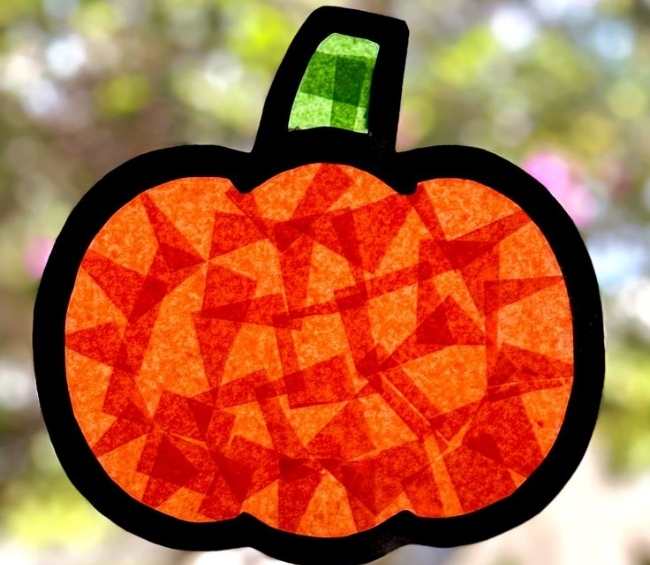
7. Pumpkin Sun Catcher
When the leaves begin to change and the air starts to feel a little cooler, it’s the perfect time to bring out the fall crafts. This colorful project is a fun way for kids to celebrate the season while creating a cheerful decoration that brightens any window. Whether yo are decorating for autumn, Halloween, or simply enjoying a cozy craft afternoon, this activity is sure to be a favorite.
Material Needed:
- Black cardstock
- Contact paper
- Orange tissue paper
- Child-safe scissors
- Pencil
- Ribbon
Procedure:
- Draw and cut out a pumpkin shape from orange cardstock, leaving the center open to create a frame.
- Cut a small green leaf and attach them to the top of the pumpkin.
- Attach a sheet of contact paper to the back of the pumpkin frame.
- Tear the tissue paper into small pieces.
- Fill the center of the pumpkin with the colorful pieces, layering different shades of orange for extra depth.
- Seal the front with another sheet of contact paper if desired.
- Trim away any excess contact paper around the edges.
- Punch a hole at the top, thread a ribbon through it, and hang the finished pumpkin in a sunny window.
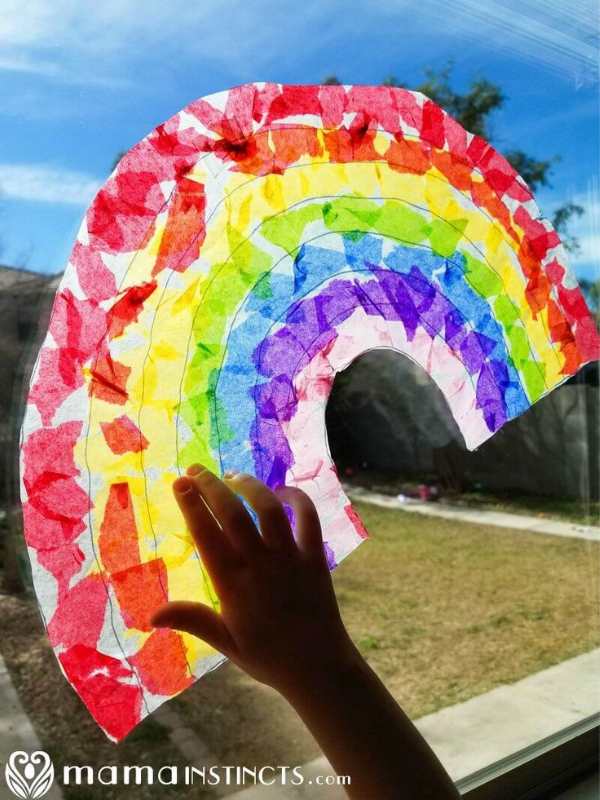
8. Rainbow Sun Catcher
Rainbow usually catch the attention of kids. The bright colors, and the chance to use every favorite color make this craft one that kids rarely get tired of. It’s a cheerful project for any time of year and an easy way to add a splash of color to your home or classroom.
Materials Needed:
- White or black cardstock
- Contact paper
- Different colors of tissue paper (red, yellow, green, pink, blue, purple, orange)
- Child-safe scissors
- Pencil
- Ribbon
Procedure:
- Draw and cut out a rainbow shape from cardstock.
- Attach a sheet of contact paper to the back of the rainbow.
- Cut the tissue papers or into small pieces.
- Fill each section of the rainbow with the matching colors.
- Seal the front with another sheet of contact paper if desired.
- Trim away any excess contact paper around the edges.
- Punch a hole at the top, thread a ribbon through it, and hang the finished rainbow in a sunny window.
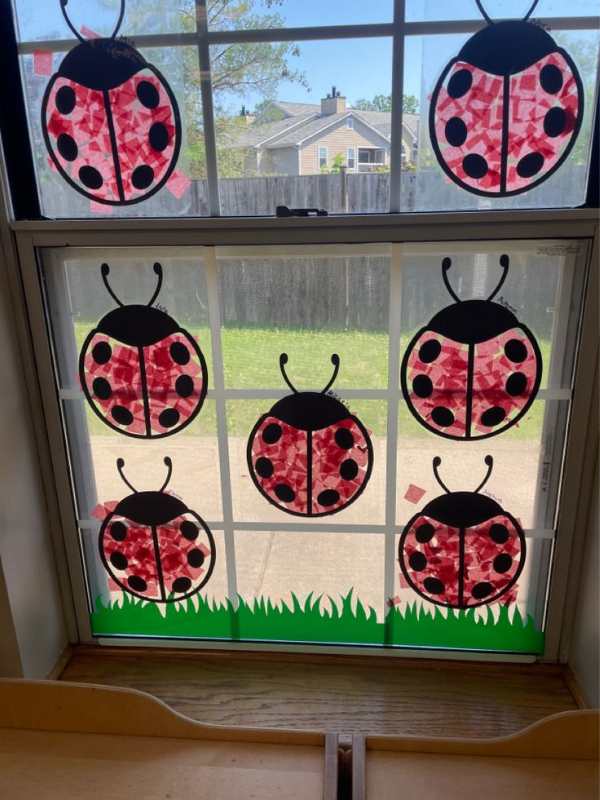
9. Ladybug Sun Catcher
The bright red wings and playful black spots of ladybug make it one of the easiest insects for little ones to recognize. Kids have fun making any ladybug craft. This project is perfect for spring, garden themes, insect studies, or simply adding a pop of color to your windows.
Materials Needed:
- Black and red cardstock
- Contact paper
- Red tissue paper
- Scissors
- Pencil
- Googly eyes (optional)
- Ribbon
Procedure:
- Draw and cut out a ladybug shape from cardstock.
- Attach a sheet of contact paper to the back of the ladybug.
- Cut the tissue paper into small pieces.
- Fill the wings with red tissue paper and use black pieces to create the ladybug’s spots.
- Add googly eyes or draw a smiling face if you’d like to give your ladybug some personality.
- Trim away any excess contact paper around the edges.
- Using a masking tape, glue the finished ladybug in a sunny window.
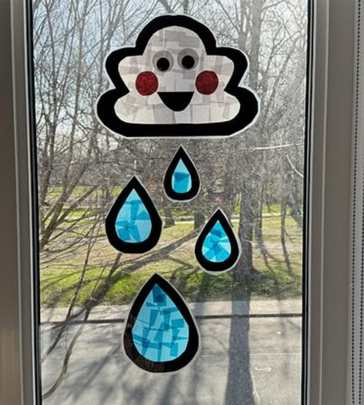
10. Cloud Sun Catcher
Not every sunny day is filled with bright blue skies, and that’s exactly what makes this craft so charming. A cloud sun catcher reminds children that even fluffy clouds can be beautiful, especially when they are decorated with soft colors that sparkle in the light. It’s a calming project that’s perfect for weather lessons, rainy afternoons, or simply slowing down and enjoying some creative time together.
Materials Needed:
- Black cardstock
- Contact paper
- White, and light blue tissue paper
- Scissors
- Pencil
- Ribbon
Procedure:
- Cut out a cloud shape from cardstock using a template.
- Stick a sheet of contact paper to the back of the cloud.
- Tear the tissue paper into small pieces.
- Invite your child to arrange the colors inside the cloud until the center is completely covered.
- Place another sheet of contact paper over the front to protect the design, if desired.
- Trim the edges neatly around the cloud.
- Punch a hole at the top, thread a ribbon through it, and hang it where the sunlight can shine through.
If your little one enjoys easy, hands-on activities like this, they may also have fun with my masking tape activities for toddlers that are easy and fun, another low-prep way to spark creativity and keep busy hands engaged.
11. Sunshine Sun Catcher
Nothing lifts a child’s mood quite like a bright, smiling sun. This cheerful craft is a wonderful way to celebrate warm summer days, learn about the weather, or simply bring a little sunshine into your home. It’s easy to make, full of vibrant colors, and looks especially beautiful when the morning light shines through the window.
Materials Needed:
- Yellow and orange cardstock
- Contact paper
- Yellow, orange, and gold tissue paper
- Child-safe scissors
- Pencil
- Ribbon
Procedure:
- Using a template cut out sun shape outline.
- Attach a sheet of contact paper to the back of the sun outline.
- Tear the tissue paper into small pieces.
- Get your child to fill the center and rays with shades of yellow, orange, and gold.
- Seal the front with another sheet of contact paper if desired.
- Trim away any excess contact paper around the edges.
- Punch a hole at the top, thread a ribbon through it, and hang the sun catcher where it can catch plenty of sunlight.
If your little ones enjoy weather-themed projects like this, be sure to check out my Cute Sun Crafts for Preschoolers for even more sunny ideas that will keep them creating and smiling.

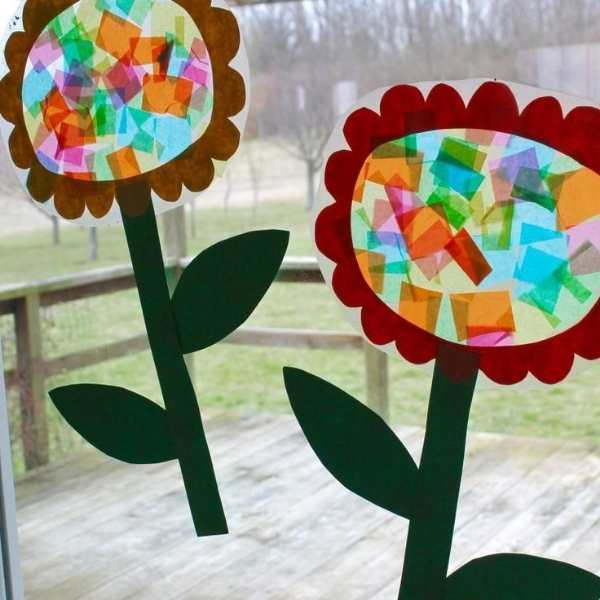
12. Flower Sun Catcher
Flowers have a wonderful way of making any space feel brighter, and this craft captures that same cheerful feeling. Whether it’s springtime or you simply want to bring a little color indoors, a flower sun catcher is an easy project that lets kids explore their creativity while making something beautiful to display.
Materials needed:
- Colored cardstock
- Contact paper
- Different colors of tissue paper
- Scissors
- Pencil
- Green cardstock (for the stem and leaves)
- Ribbon
Procedure:
- Draw and cut out a flower shape from cardstock, leaving the petals and center open to create a frame.
- Attach a sheet of contact paper to the back of the flower.
- Tear the tissue paper into small pieces.
- Fill the petals and flower center with colorful pieces, mixing shades to create a vibrant design.
- Add a green stem and leaves if you’d like to complete the flower.
- Seal the front with another sheet of contact paper for extra durability, if desired.
- Trim away any excess contact paper around the edges.
- Punch a hole at the top, thread a ribbon or string through it, and hang the flower in a sunny window.
If your kids enjoy making bright, colorful creations like this, they will also love exploring my Creative DIY Summer Crafts for Kids for even more fun seasonal projects.
13. Star Sun Catcher
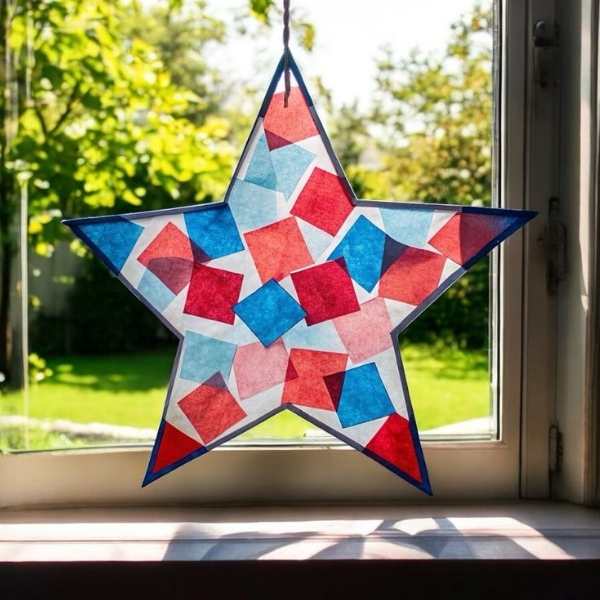
Stars often remind kids of a clear night sky, a favorite bedtime story, or even a special celebration. This simple craft gives children the chance to create their own shining star, and once it’s hanging in the window, the sunlight makes it sparkle in a way that’s sure to catch everyone’s attention.
Materials Needed:
- Yellow, white, or gold cardstock
- Contact paper
- Colorful tissue paper or cellophane
- Scissors
- Ribbon
Procedure:
- Cut out a large star shape outline from cardstock using a star template.
- Attach a sheet of contact paper to the back of the star.
- Tear the tissue paper or cellophane into small pieces.
- Fill the center of the star with your chosen colors.
- Seal the front with another sheet of contact paper if desired.
- Trim away any excess contact paper around the edges.
- Punch a hole at the top, thread a ribbon through it, and hang the finished star in a sunny window.
If you are looking for more simple projects to keep little hands busy, don’t miss my Popsicle Stick Match Activities for Toddlers, which are packed with creative ideas for year-round fun.
14. Spider Web Sun Catcher
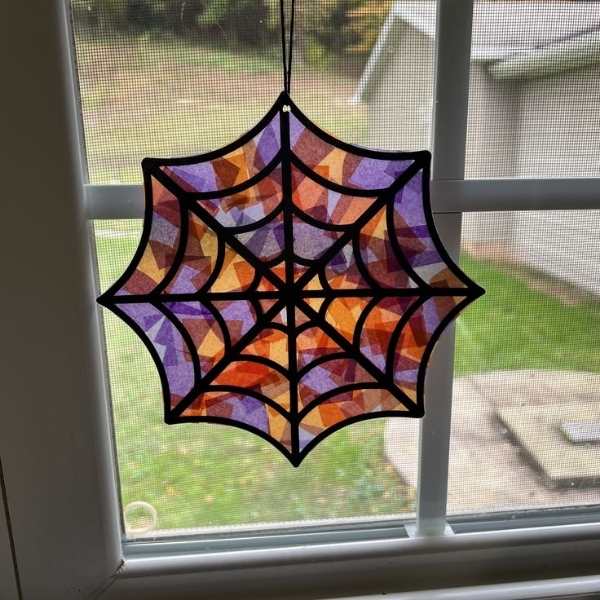
This craft is a fun way to celebrate the spooky season without being too scary for little ones. The web catches the sunlight beautifully, creating a colorful stained-glass effect that looks amazing in a window. Whether you are planning Halloween activities or exploring spiders and insects, this project is a creative way to keep kids engaged.
Materials Needed:
- Black cardstock
- Contact paper
- White, silver, orange, or purple tissue papers
- Scissors
- Black paper or a small plastic spider (optional)
- Ribbon
Procedure:
- Cut out a spider web design from black cardstock using a spider web template.
- Attach a sheet of contact paper to the back of the web.
- Tear the tissue paper into small pieces.
- Fill the open spaces of the web with colorful pieces to create a stained-glass effect.
- Add a small paper or plastic spider if you’d like a playful finishing touch.
- Seal the front with another sheet of contact paper if desired.
- Trim away any excess contact paper around the edges.
- Punch a hole at the top, thread a ribbon or string through it, and hang the spider web in a sunny window.
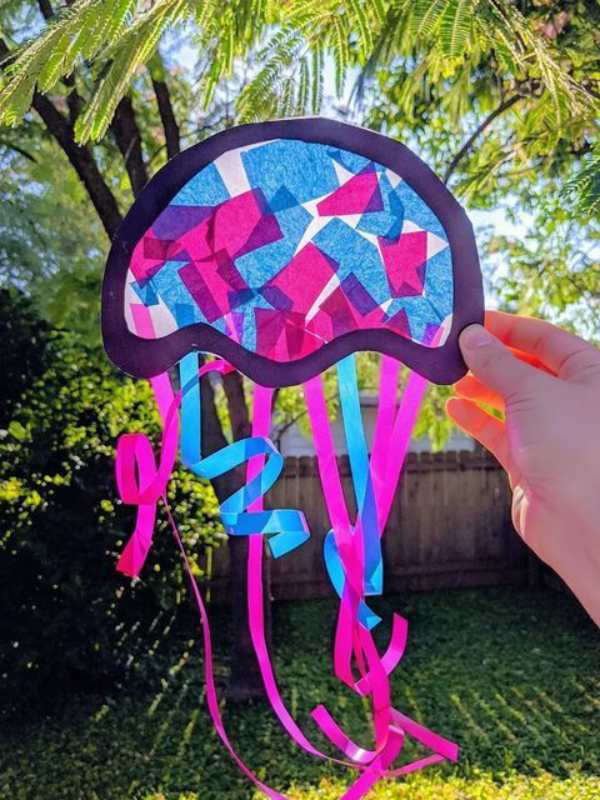
15. Jellyfish Sun Catcher
If your child is fascinated by ocean animals, this is a craft they will be excited to make. With its flowing tentacles and bright colors, a jellyfish sun catcher looks almost like it’s floating through the sea when the sunlight shines through it. It’s a fun choice for summer crafts, beach themes, or ocean learning activities.
Materials Needed:
- Purple cardstock
- Contact paper
- Tissue paper in ocean-inspired colors
- Child-safe scissors
- Pencil
- Ribbon, or curling ribbon (for the tentacles)
Procedure:
- Draw and cut out a jellyfish shape from cardstock, leaving the body open to create a frame.
- Attach a sheet of contact paper to the back of the jellyfish.
- Tear the tissue paper or cellophane into small pieces.
- Fill the body of the jellyfish with the colorful pieces until the center is covered.
- Cut several lengths of ribbon and attach them to the bottom to create the tentacles.
- Seal the front with another sheet of contact paper if you’d like extra durability.
- Trim away any excess contact paper around the edges.
- Punch a hole at the top, thread a ribbon or string through it, and hang the jellyfish in a sunny window.
For more ocean or beach themed activities, take a look at my DIY Sand Tattoos for Kids.
How to Display Your Finished Sun Catcher Crafts for Kids
- Hang them on sunny windows.
- Display them on glass doors.
- Use them to decorate classroom windows.
- Brighten up a homeschool space with them.
- Create a seasonal window display for them.
- Hang them in a child’s bedroom or playroom.
- String many of them together to make a colorful garland.
- Attach them to a ribbon and hang them from a curtain rod.
- Display them during holiday or seasonal celebrations.
- Gift them to grandparents, teachers, or friends as handmade decorations.
Safety Tips for Crafting with Young Children
Craft time should be fun, creative, and safe. A few simple precautions can help children enjoy making their sun catchers while giving parents and teachers peace of mind.
- Always supervise young children during craft time.
- Use child-safe scissors that are appropriate for your child’s age.
- Choose non-toxic glue, markers, and other craft supplies.
- Keep small items like sequins, beads, and googly eyes away from toddlers who may put them in their mouths.
- Help children with any cutting that may be too difficult or unsafe.
- Encourage children to wash their hands after crafting, especially if they have used glue, paint, or glitter.
- Store scissors and other sharp tools out of reach when the activity is finished.
- Remind children that craft supplies are for creating, not for eating or throwing.
- Keep the crafting area tidy to help prevent slips, spills, and misplaced supplies.
Frequently Asked Questions
What age are sun catcher crafts suitable for?
Most sun catcher crafts are suitable for children between the ages of 3 and above, though with adult supervision. Younger children can help stick tissue paper onto contact paper, while older kids can handle more detailed cutting and designs.
What is the best material for homemade sun catchers?
Contact paper and colorful tissue paper are the most popular materials because they are not expensive, easy to use, and also create a beautiful stained-glass effect when sunlight shines through them.
Can toddlers make sun catcher crafts?
Yes, Toddlers can enjoy simple sun catcher crafts with a little help from an adult. Let them tear tissue paper, choose colors, and stick the pieces onto contact paper while you handle the cutting.
How do you hang a sun catcher on a window?
You can use ribbon, string, suction hooks, clear adhesive hooks, or transparent tape to hang your finished sun catcher on a window where it can catch plenty of natural light.
Can I make sun catchers without contact paper?
Absolutely. You can use clear laminating sheets, self-adhesive clear paper, wax paper with glue, or even clear plastic lids, depending on the craft you are making.
How long do homemade sun catchers last?
With proper care, homemade sun catchers can last for months or even longer. Keeping them indoors and away from excess moisture or direct handling will help them stay colorful and in good condition.
Conclusion
I hope these sun catcher crafts for kids give you a few easy, joyful ideas to try with the little ones in your life. There is something so sweet about sitting down together with a handful of simple materials and watching a child turn them into something bright and beautiful. And honestly, the real magic isn’t in making a perfect craft, it’s in the laughter, the little hands at work, and that proud moment when they hold up their finished creation and can’t wait to put it in the window. Whether you are crafting at home, in a classroom, or as part of your homeschool day, I hope these projects bring a little color and a lot of happy memories to your day.